Key points
- Permanent joining creates a lasting bond between materials, often stronger than the materials themselves, using methods like soldering, brazing, and welding.
- Soft soldering joins metal parts using a filler metal with a low melting point, ideal for electronics and delicate metalwork.
- Brazing uses a filler metal with a higher melting point to create a strong bond between metal pieces, commonly used in automotive and plumbing applications.
- Welding permanently joins metal pieces by melting them at the joining surfaces and adding a filler material, essential in construction, manufacturing, and repair.
- Semi-permanent joining allows for strong connections that can be undone if needed, using methods like nuts, bolts, and screws, or knock-down fittings for flat-pack furniture.
Summary of permanent and semi-permanent joining methods
| Material: | Joint: | Type: |
|---|---|---|
| Wood | Dowel Joint | Permanent |
| Butt Joint | Permanent | |
| Metal | Machine Screw | Semi-Permanent |
| Pop Riveting | Permanent | |
| Plastic | Tensol Cement | Permanent |
Permanently joining two materials means joining them together in a way that makes the bond last forever and not easy to take apart. The connection between the materials is really strong, often stronger than the materials themselves.
Semi-permanent joining means connecting two materials in a way that is strong but can be undone if needed.
Permanent joining methods
Permanently joining two materials means joining them together in a way that makes the bond last forever and not easy to take apart. The connection between the materials is really strong, often stronger than the materials themselves.
Soft soldering
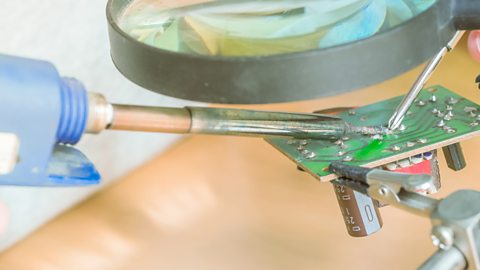
Soft soldering is a process used to join metal parts together using a filler metal with a melting point below 450°C. It creates a low temperature, strong bond often used in electronics and delicate metalwork.
Step by step
PREPARE - Clean the metal surfaces to remove dirt, oxidation or grease. Use a wire brush or abrasive pad to achieve a clean surface.
APPLY -Apply a flux to the metal surfaces. The flux helps to prevent oxidation during heating and allows the solder to flow smoothly.
HEAT - Use a soldering iron to heat the joint area. The soldering iron should reach a temperature of around 350°C to 400°C. Heat the metal parts not just the solder.
FEED - Feed solder into the joint while the metal parts are heated. The solder will melt and flow into the joint, filling any gaps.
COOL - Allow the joint to cool naturally. Inspect the soldered joint to ensure it has a smooth, shiny appearance and is free of cracks or gaps.
| Applications | Health & Safety |
|---|---|
| Joining electrical components on circuit boards. Assembling delicate metal parts in jewellery making. Connecting copper pipes and fittings in plumbing. | Work in a well ventilated area to avoid inhaling fumes from the flux and solder. Wear safety goggles and gloves to protect against heat and solder splashes. Handle the soldering iron with care. Ensure it is placed in a stand when not in use. Use soldering tools carefully to avoid burns. |
Brazing
Brazing is a metal joining process where a filler metal with a melting point above 450°C (but below the melting point of the base metals) is used to bond metal pieces together. The filler metal flows into the joint by capillary action, creating a strong and durable bond.
Learn how to join metal by brazing
Brazing is a metal joining process where two or more pieces of metal are fused together using a filler metal that melts at a higher temperature than soldering but lower than the melting point of the metals being joined.
Prepare your PPE and equipment. A welding mask will protect your face and eyes from sparks and heat. Gloves will protect your hands from sparks and hot metal. Ensure your hair is tied back, if necessary, and any loose clothing is secured. After putting on your mask and gloves, and firmly securing your brazing material in the clamp, direct the brazing welder away from your face and ignite the torch.
Heat the base metal. Hold the torch at an angle and direct the flame at the joint where the two pieces meet. Heat both the base metals evenly.
Avoid overheating a single spot as it can cause damage. Once the base metals are hot enough, take the filler metal and place it near the joint.The filler metal should melt and flow into the gap between the metals. Make sure that the filler metal flows evenly and fills the entire joint. BBC tech - brazing video.docx Avoid overheating the base metals, as this can cause them to warp.
Allow the metal to cool slightly. Then carefully turn over and fill the joint cavity with more filler metal.
Check the joint for any gaps or weaknesses. Ensure that the filler metal has flowed properly and the joint is secure.
Clean the brazed joint using a wire brush.
Step by step
PREPARE - Clean the metal surfaces to remove any rust or dirt. Use a wire brush or abrasive paper to achieve a bright, clean surface.
APPLY - Apply flux to the cleaned metal surfaces to prevent oxidation and help the filler metal flow smoothly into the joint.
HEAT - Use a torch to heat the joint area to around 700°C to 900°C. Ensure the metal is heated uniformly to allow the filler rod / wire to flow properly.
APPLY - When the base metals are heated, apply the filler rod / wire. The filler rod / wire will melt and flow into the joint, filling any gaps.
COOL - Allow the joint to cool naturally. Inspect the brazed joint to ensure it has a smooth, continuous bond with no gaps.
| Applications | Health & Safety |
|---|---|
| Joining parts in car engines and exhaust systems. Joining copper pipes and fittings. | Work in a well ventilated area to avoid inhaling fumes. Wear safety goggles and gloves to protect against heat and filler rod/wire. Use tongs or heat resistant tools to handle hot metal. Handle the torch carefully and ensure it is properly secured when not in use to avoid accidents. |
Welding
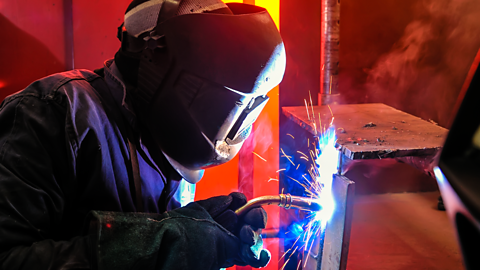
Welding is a process used to PERMANENTLY join two or more pieces of metal together by melting them at the joining surfaces and adding a filler rod/wire, which cools and solidifies to form a strong bond. Welding creates a permanent connection, making it essential in construction, manufacturing and repair work.
MIG welding step by step
PREPARE - Set up the MIG (metal inert gas) welder to ensure the wire electrode and shielding gas are suitable for the metal being welded.
CLEAN - Prepare the metal by cleaning the surfaces to be welded. Remove any rust, paint or dirt to ensure the weld is successful.
ALIGN - Align the pieces by positioning the metal parts together at the intended joint. Use clamps to secure them in place or fireproof bricks if necessary
PPE (personal protective equipment) - Put on safety gear including a welding mask, gloves and protective clothing to protect from sparks and bright light.
TURN ON - Set the MIG welder to the appropriate settings for the type and thickness of the metal being welded.
WELD -Begin welding by holding the welding gun and pulling the trigger. The wire will feed through the gun and melt as the welding progresses, while the machine will also emit shielding gas to protect the weld from air.
Guide the gun along the joint where the metal parts are joined. Maintain a steady hand and consistent speed to ensure a strong and smooth weld.COOL –Allow the weld to cool naturally after finishing.
| Applications | Health & Safety |
|---|---|
| Fixing or joining parts of a car body. Making or repairing metal furniture, projects and structures. | Always use a welding mask (to prevent arc eye), gloves and protective clothing. Work in a well ventilated area or use an extractor fan to avoid inhaling harmful fumes. |
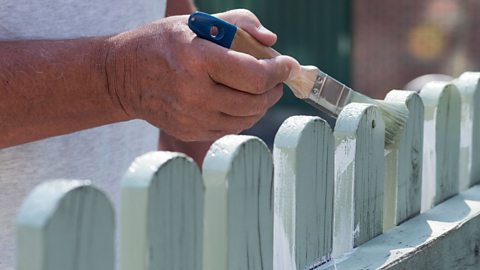
Wood adhesives
Wood adhesives are special glues used to stick pieces of wood together such as PVA (polyvinyl acetate) glue.
- Preparation - clean the surfaces of the wood to remove dust and dirt. Make sure they fit together well
- Application- apply a thin, even layer of glue on one surface
- Joining - press the two pieces of wood together firmly
- Clamping - hold them in place with clamps or weights to keep them tight while the glue dries
- Drying - let the glue dry completely, which usually takes a few hours or more, depending on the type of glue used (usually overnight)
- Safety - always use wood adhesives in a well ventilated area and avoid getting glue on your skin
Learn how to glue wood properly
Wood glue is very useful for attaching separate pieces of wood together. It creates a very strong bond between these pieces of wood.
This can be particularly useful as it won’t require screws or nails that might ruin the aesthetic of the piece.
Depending on the size or shape of the wood gluing may be the only option to attach two pieces together.
This is everything you will need to begin.
You will obviously need your wood glue as well as the wood you want to glue.
You will also require a number of wood clamps. These are used to hold the wood in place while the wood glue is drying.
Some paper towels are also required, this is used to clean up any excess glue that may squeeze out of the joins.
Lastly you should also have a ruler or some sort of measuring equipment. This will help make sure everything is correctly lined up.
The first step should be to apply the wood glue to all the sections you would like to glue together.
You should apply enough glue to ensure a strong bond can be created.
The amount shown in the video is appropriate to create a string bond.
The glue is not super fast drying, so you should have enough time to apply the glue without needing to rush.
Once you have applied all the glue, you are then ready to fit all the pieces of wood together.
Fit the pieces of wood together. Rubbing the wood back and forth makes sure that the glue gets properly spread across the entire face of the wood. This should help ensure a strong enough bond between the two pieces of wood.
Before tightening the clamps, it is advisable to put some spare pieces of wood between your work and the actual clamps. This will make sure the clamps don't damage or mark your material. The clamps need to be very tight and without the extra protection this could mark your material.
You can now begin to tighten your clamps. Tighten each clamp one at a time.
You should tighten the clamps as much as you can. This will ensure the wood is securely held in place while the glue dries.
In this example, we are using 3 clamps. This is enough to ensure a secure hold across the entire piece. Depending on what you are working on though, you may need to use more.
You just want to make sure that pressure is being applied evenly across all the sections of the wood that are being joined together.
As you tighten the clamps, excess wood glue will be pushed out of the different sections. This should be cleaned up as much as possible. This will mean it doesn't need to be removed later when it has dried and is more difficult to do.
Before leaving the glue to dry you should check to make sure everything is in line. While the glue is drying, you can still adjust the position of the wood.
When gluing two larger faces together you largely follow the same process.
You again begin by applying the glue to the section of the wood you would like to join together.
You can spread out the glue across the whole face using a spare piece of wood. The wood can spread the glue around without absorbing any of it itself. Unlike if you were to use the paper towel.
Then place the other section of wood into place. Ensuring they are lined up correctly.
Like in the previous example, it is also advised to use an extra piece of scrap wood to sit between your work and the clamp. Again ensuring that your work is not damaged by the clamp.In this example, one g-clamp should be enough to apply the required amount of force to hold the wood in place while the glue dries.
Lastly, clean up the excess glue from around your work and then simply wait for it to dry.
Test yourself
More on Manufacturing - tools and processes
Find out more by working through a topic
- count6 of 7
- count7 of 7