What are the key points about finishing techniques?
- In a workshop, preparing materials before finishing is essential for a smooth, durable result.
- For metal this means cleaning, sanding and priming.
- Wood requires sanding and filling.
- Plastic needs cleaning, sanding and priming.
- Proper preparation ensures that finishes adhere well and enhance the final appearance of the product.
Summary of various finishes for metal wood and plastic:
| Material: | Finish: |
|---|---|
| Metal | Galvanising Plastic dip coating Paint Polish |
| Wood | Stain Varnish Paint |
| Plastic | Polish |
How do you prepare different materials for finishing?
Preparing metal
Clean the surface - remove rust, dirt and grease using a wire brush
Sand - use sandpaper or a grinding wheel to smooth the metal surface. Start with a coarser grit and progress to a finer grit
Remove dust - wipe down the surface with a clean, dry cloth to remove dust and debris
Apply primer - if needed apply a metal primer to prevent rust
Finish application - apply the chosen metal finish (paint, powder coating)
Preparing wood
Finishing wood
All wooden items and components have to be finished in order to seal and protect the surface of the wood.
Before you get started here are some things you're going to need:
Glass paper in a variety of grit sizes, a metal rule, a selection of wood oils with a cloth or sponge, some wax, wood stain, varnish or lacquer, and goggles and a dust-mask.
The process of finishing wood usually comes down to sanding and that can take longer than you think, so you'll need to be patient.
Like any abrasive process, sanding is about gradually removing smaller and smaller layers of the surface until it's completely smooth.
You'll need to do this in stages, using a few different types of glass paper of progressively finer grades.
Each stage removes the scratches left by the previous grades to give a smooth and even finish.
To start, get your dust-mask and goggles on and start smoothing with an 80 grit glass paper, then move on to a 120 grit, finally a 240 grit.
Remember to sand in the direction of the grain for a smooth finish. For larger flat surfaces you can get great results with an electric sander.
Now you've got a smooth finish you need to protect the wood, you could paint it, but you would lose the grain.
So here are three options that will protect and enhance the wood.
Wood oils, like teak oil, Danish oil or linseed oil, soak into and seal the wood, enhancing the grain.
You should apply oils directly to the wood with a cloth or sponge.
Wax will enhance the natural colour and grain of the wood and leave you with a satin or high-shine finish.
There are natural and chemical waxes, but both get the same result.
Applied with a soft cloth, or tissue, they are absorbed by the wood and, when they dry, they seal the grain against water or moisture.
And finally, you can stain the wood using a coloured, water-based stain to coat the surface. It soaks into the grain and then dries.
You should then seal the wood with a varnish or lacquer.
There are two types of varnish: water-based and chemical-based.
Water based varnishes are easiest to use, simply apply three coats, sanding between each one.
Clean the surface - remove dust, dirt and old finishes with a damp cloth and let the wood dry completely
Sand the surface - use sandpaper or an electric sander to smooth the wood. Start with a coarse grit and work up to a fine grit
Remove dust - wipe down the surface with a clean, dry cloth to remove dust and debris
Fill imperfections - use wood filler to fill any holes or cracks. Sand the filled areas once the filler has dried
Remove dust - wipe the surface with a cloth to remove all sanding dust
Apply finish - apply the chosen wood finish (paint, varnish, stain or oil)
Preparing plastic
Finishing plastic
There are a few things you can do to give a polished finish to any plastic component, no matter how it's been shaped or cut.
Before you get started, here are some of the things you're going to need:
A selection of files
A metal rule
A range of wet and dry paper
A wax polishing wheel and some wax
A blowtorch
Some hot work gloves, apron and goggles
And finally, a face shield
Like all abrasive processes, the idea is to start with more abrasive tools and materials, and then, step by step, use less abrasive techniques until you're happy with the finish.
Flatten rough edges by cross-filing. Push the file across and along the surface until its feels flat to touch.
Keep the file flat to the workbench to make sure the edges are square.
To file a curve, start with the file flat on one edge, then run it along the curve, finishing with it flat on the other edge.
At this stage, you will have marks from the filing which you should remove with a steel rule or scraper.
To get a good near-polished finish, you will now need to use wet and dry paper.
Wet the paper with a little water to reduce friction.
Start with a 280 grit, then move on to 600 grit, and finally 1200 grit.
Remember, that the higher the grit number, the finer the finish.
After this the surface should feel very smooth.
To achieve a high polish finish you now have two options.
The most common way is to use a wax polishing wheel and you'll need your goggles or face shield and gloves for this.
Apply the wax to the cloth wheel.
Then working from the centre towards the corners, use the machine to polish the edges.
Be careful here not to snag the cloth on the corners.
Re-apply the wax to the wheel every 30 seconds or so to avoid excessive friction which could melt the edges.
If you are polishing high impact polystyrene, you will need to take extra care. It has a much lower softening point than acrylic and so is more likely to melt with excessive friction.
Finally, remove any remaining wax with the polishing mop.
You can get a really clear glass-like finish by flame polishing your plastic edges.
For this process, you will need to put on your hot work protective gloves, apron and a face shield.
This option will only work for acrylic. Flame polishing cannot be used to finish high impact polystyrene.
We are using a blowtorch here but you can get the same result with a brazing torch or an oxy acetylene torch. It is a very quick and simple process and gives a great finish to your plastic.
Clean the surface - use a plastic safe cleaner to remove any dust, oil or grease
Sand the surface - lightly sand with fine grit sandpaper to create a rough surface for better adhesion
Remove dust - wipe the surface with a clean, dry cloth to remove dust
Apply primer - if necessary, apply a plastic primer to improve the adhesion of the final finish
Apply finish - use a suitable finish (paint, spray coating)
What are some real-world examples of finishing techniques?
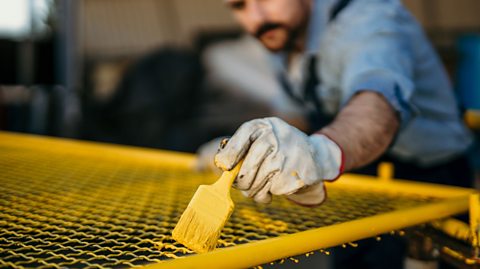
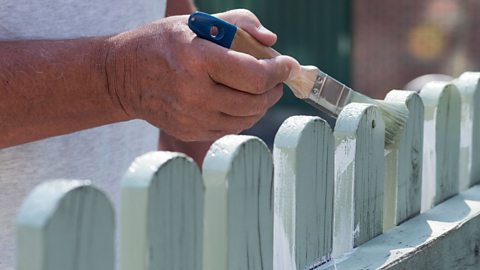
Painting a metal fence
- Function - prevents rust and extends the fence's life by protecting it from rain and other elements.
- Aesthetics - adds a fresh, vibrant color to the fence, enhancing its appearance.
- Environment - reduces rust related deterioration, lowering the need for frequent replacements and minimising waste.
Step by step
- Clean the fence with soapy water to remove dirt and grease. Rinse and let it dry.
- Use a wire brush or sandpaper to remove any rust and smooth the surface. Wipe off the dust with a cloth.
- Sanding - sand the entire surface lightly to create a rough texture that helps the paint adhere better. Remove any remaining dust with a damp cloth.
- Priming - apply a primer to all surfaces of the fence.
- Painting - choose a metal specific outdoor paint. Apply the paint in thin, even coats using a brush. Allow each coat to dry before applying the next.
- Finishing - check the fence for any missed spots and do touch-ups if necessary. Allow the paint to dry fully before using the fence.
Dipcoating a metal tool
- Function - Provides a protective coating that prevents rust and corrosion, enhancing the durability and lifespan of the metal tool.
- Aesthetics - Adds a smooth, colorful finish that can improve the appearance.
- Environment - Reduces the need for frequent repairs or replacements, which helps in minimising waste and the environmental impact.
Dip Coating with plastic powder and undefined
- Clean the metal - Remove dirt and rust.
- Preheat object - Heat the metal in the oven to about 180°C to 200°C to help the powder stick.
- Prepare powder - Place plastic powder in a fluidising bath, which keeps the powder suspended using air.
- Dip in powder - Submerge the preheated metal into the fluidised powder to coat it evenly.
- Cure coating - Return the coated object to the oven at about 180°C to 200°C to melt and solidify the powder. Let it cool.
Remember:
Use in a well ventilated area to avoid inhaling fumes. Wear gloves, goggles and a mask.
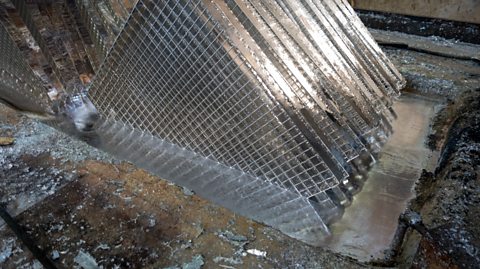
Galvanising a metal tool
Galvanising is a process of coating metal with a layer of zinc to protect it from corrosion.
Zinc acts as a barrier to prevent moisture and oxygen from reaching the underlying metal - protecting it from rust and corrosion – but the zinc also acts as a A more reactive metal than iron, attached to an iron or steel object to prevent the object rusting.. Zinc is more reactive than iron, so it A chemical reaction where a substance reacts with oxygen to form an oxide. Iron reacts with oxygen in the air to produce iron oxide, better known as rust. Zinc reacts to produce zinc oxide. rather than the iron object.
Galvanising significantly extends the life of metal products, making them more durable and reducing maintenance costs.
Preparation
- Cleaning- remove dirt, rust and old paint from the railing. Use a wire brush, sandpaper or a chemical rust remover.
- Degreasing- clean the metal with a solvent to remove oils and grease. This ensures the zinc adheres properly.
- Pickling- immerse the railing in an acid solution to remove any remaining Iron reacts with oxygen in the air to produce iron oxide, better known as rust. Zinc reacts to produce zinc oxide. and contaminants.
Galvanising Process
- Fluxing- dip the cleaned metal in a a chemical cleaning agent that is used to clean and help join metals solution to prevent oxidation before zinc coating.
- Heating- preheat the metal to around 150-200°C to help the zinc bond better.
- Dipping- submerge the metal railing in a molten zinc bath heated to about 450°C.
- Cooling- allow the coated railing to cool and harden in air. The zinc forms a hard, protective layer.
Remember:
- wear gloves, goggles and a mask to avoid contact with chemicals and fumes.
- ensure proper ventilation to avoid inhaling fumes from the chemicals and molten zinc.
- use appropriate tools and techniques to handle the hot metal and molten zinc safely.
Painting a wooden fence
Clean the fence using a stiff brush or pressure washer to remove dirt and cobwebs, then allow it to dry completely. Sand any rough areas and fill any cracks with wood filler if necessary.
Choose a suitable outdoor wood paint, stir it well and use a wide brush or sprayer to apply it evenly. Start from the top and work down, ensuring you cover all surfaces, including edges.
Once the first coat is applied let it dry fully before applying a second coat.
Allow the paint to dry completely. Clean your brushes or sprayer immediately after use.
Test yourself
More on Manufacturing - tools and processes
Find out more by working through a topic
- count7 of 7

- count3 of 7