Key points
- The butt joint is the simplest wood joint where two pieces are joined end-to-end, suitable for basic constructions where strength is not important.
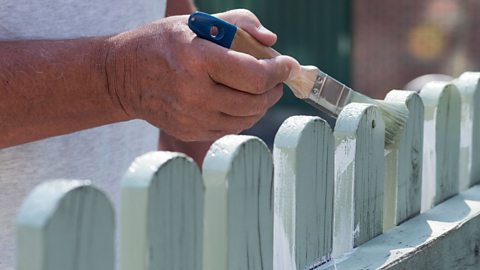
- In a mitre joint, pieces are cut at a 45-degree angle and joined to form a corner, often used for picture frames and boxes.
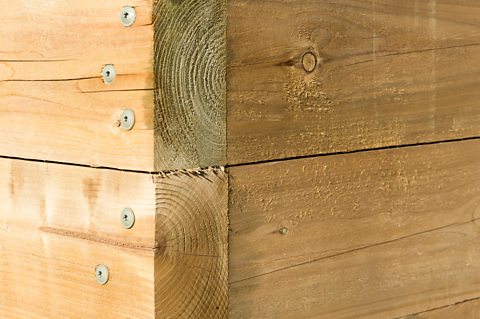
- The dowel joint uses wooden or plastic dowels to reinforce the joint, providing strength for furniture and shelving.
- The housing joint involves cutting a groove in one piece to accommodate the other, ideal for shelves and cabinet frames.
- Riveting uses metal pins to join pieces, creating a strong, permanent connection in metalwork.
- Pop riveting fastens rivets where only one side is accessible, suitable for sheet metal and car repairs.
- Adhesive bonding uses glues or adhesives specifically designed for plastics to join pieces together.
- Solvent welding uses a solvent to dissolve the surface of the plastic, allowing pieces to bond as the solvent evaporates, often used for PVC pipes and acrylic joining methods
Summary of permanent and semi-permanent joining methods
| Material: | Joint: | Type: |
|---|---|---|
| Wood | Dowel Joint | Permanent |
| Butt Joint | Permanent | |
| Metal | Machine Screw | Semi-Permanent |
| Pop Riveting | Permanent | |
| Plastic | Tensol Cement | Permanent |
Wood joints
The correct method of using chisels to cut joints in wood
First, gather the tools you require, deciding which chisel will be more appropriate.
The blue chisels are called bevel edged chisels. The yellow chisels are known as mortise chisels.
A bevel edge chisel is for more general purposes, while a mortise chisel is specialised for deep, forceful cuts. Clearly marking out the material you wish to remove is an important step in the process. Using the try square under the blade, mark out on the wood the waste area you plan to remove.
It is important to hold the chisel properly.
This is how to hold your chisel while using a mallet, the chisel held securely in hand. Your mallet should be held in your dominant hand and lastly, your fingers should be behind the cutting edge at all times.
When not using a mallet. This is how you should hold a chisel. Make sure you have a secure hold on the chisel and your fingers are still behind the cutting edge.
With your work safely secured, in a G-clamp, mark out the perimeter of a joint with the flat edge of the chisel. Carefully use the chisel to remove the waste wood. When cutting a mortise and Tenon joint cut to half depth. Then rotate the workpiece, reclamp and repeat.
Make sure to withdraw the chisels before using fingers to clear.
Use the mortise and Tenon joint to test the depth of the cavity and to push out excess wood.
Carefully place the mortise and Tenon joint into the cavity and push down until it is fully inserted.
The workpiece should be held securely to the sawing board with your fingers, you should keep your body position low and your Arms supported by the table, keeping your fingers behind the blade at all times. Into the centre and rotate the work as required.
You can dry assemble the joint to check the fit.
Butt joint
Measure and cut - measure the lengths of the wood pieces you want to join and cut them to the desired size
Tools – pencil, (possibly marking knife and safety ruler), steel rule, tri square, tenon saw for straight lines, wood work vice or -bench hook, clean up edges on band facer
Apply glue- spread PVA wood glue evenly on the end of one piece
Join pieces - press the glued end against the end of the other piece
Clamp - use clamps to hold the pieces together firmly
Dry- let the glue dry overnight
Applications- used for simple frames, basic furniture and when minimal strength is needed
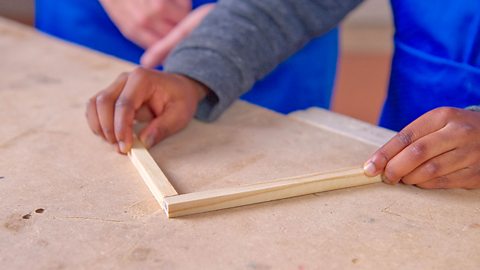
Image caption, The butt joint is the simplest way to join two pieces of wood together.
1 of 2
Mitre joint
- Measure and cut - measure (used to set an angle for cutting waste material or marking a woodwork joint. The bevel blade can be adjusted to create the exact angle required., steel rule, pencil) and cut each piece of wood at a 45-degree angle using a mitre saw or hand saw and 45-degree angle jig
- Apply glue - apply glue to the angled edges of both pieces
- Join pieces - press the pieces together to form a corner
- Clamp - use clamps to hold the joint in place
- Dry - allow the glue to dry fully
- Applications - common for making picture frames and decorative boxes
Dowel joint
A dowel joint uses a wooden or plastic peg, called a sometimes dowell - a solid, cylindrical rod of wood or plastic, often cut into short lengths to join two pieces of wood together via pre-drilled holes, which fits into aligned holes to reinforce the joint.
Measure and mark - mark the positions for the dowels on both pieces of wood using a dowell jig. Mark holes with bradawl.
Drill holes - Drill matching holes in both pieces where the dowels will go using clamp and pedestal drill
Apply glue - coat the dowels and inside the holes with wood glue
Insert dowels - insert dowels into one piece, then align the second piece and press it into place
- Clamp - clamp the pieces together until the glue dries
- Applications - provides strong, precise joints for furniture, cabinets and shelving.
Housing joint
Measure and mark - measure and mark where the groove will be cut into one piece of wood (pencil, steel rule, marking gauge, tri square)
Cut the groove - cut a groove in the wood to fit the other piece. Using forstner bit, pedestal drill, clamps, tidy up groove with a hand chisel
Apply glue - apply wood glue to the groove and the edge of the second piece
Insert piece - insert the second piece into the groove
Clamp - clamp the joint and let the glue dry
Applications - ideal for constructing shelving, drawer slides and cabinet frames
Riveting and pop riveting
Riveting - a method of joining two or more pieces of metal together by inserting a metal pin (rivet) through aligned holes and deforming the ends to secure them.
Measure and mark- align the pieces you want to join and mark where the rivet holes will go
Drill holes - drill holes through the aligned pieces
Insert rivet - place the rivet through the holes
Deform rivet - use a ball pein hammer to deform the ends of the rivet, creating a tight fit
Inspect - ensure the rivet is secure and flush with the surface
Applications - used in metalwork for aircraft, structural steelwork and various machinery. Provides a strong, permanent joint
Safety tips
- Wear safety glasses - protect your eyes from metal debris
- Use proper tools - ensure you use the correct rivet and riveting tools for the job
- Check rivets - ensure all rivets are properly deformed and secure
Pop riveting
Pop riveting involves using a special rivet gun to insert and fasten a rivet in a hole where only one side is accessible.
Pop riveting will permanently fix two pieces of thin material together. It can be used for thin materials like aluminium, acrylic or high impact polystyrene.
Before you get started, here are some things you're going to need:
Pop rivets and a pop riveter
A clamp
A drill and a variety of drill bits
Masking tape and a pencil
And some goggles
Start by lining up your materials with an overlap of at least 10mm and clamp them in place.
Make sure you place the layer you want to have the best finish on top.
Now, drill a hole the same diameter as your rivet through both layers of material.
Insert the rivet from the upper surface and make sure that the flange sits flush with the surface of your material.
Place the pin of the rivet into the pop-riveter, then squeeze the handles until the pin breaks off, leaving the compressed rivet to hold the materials together.
If you take a look at the back, you'll see there is a small tail on the rivet, which is why pop riveting is not good for anything that needs to sit flat against another material.
You should repeat this process as many times as you need for your materials to feel secure.
For the best finish try and ensure your rivets are evenly spaced.
Measure and mark - align the pieces and mark where you will drill holes (as above with riveting)
Drill holes - drill holes in the pieces to be joined (as above with riveting)
Insert rivet - place the pop rivet into the hole
Use rivet gun - use a pop rivet gun to pull the rivet's mandrel, which expands the rivet and secures it
Check rivet - ensure the rivet is fully expanded and the joint is secure
Applications - ideal for sheet metal work, car repairs and where access to only one side of the material is available. Quick and easy to use
Safety tips
- Wear safety glasses - protect your eyes from flying debris (mandrel falls from rivet gun)
- Use correct size - ensure you are using the correct size of rivet and drill bit.
- Handle tools carefully - be careful not to nip yourself!
How to join plastics
Adhesive bonding
Adhesive bonding involves using a special glue or adhesive designed for plastics to bond the pieces together.
Clean surfaces - esure the surfaces are clean and dry
Apply adhesive - apply a thin, even layer of adhesive to one or both surfaces
Join pieces - press the pieces together firmly
Clamp - use clamps or weights to hold the pieces together while the adhesive cures
Applications - ideal for plastic models, household repairs and crafts
Safety tips
- adhesives can emit strong fumes. Use in a well-ventilated area
- use gloves to prevent adhesive from contacting your skin
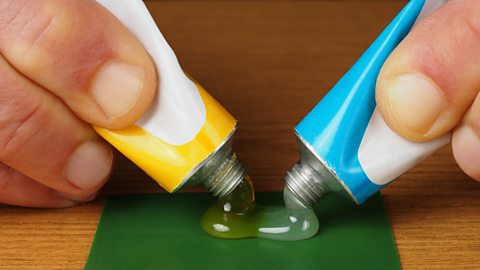
Solvent welding
Solvent welding uses a solvent to dissolve the surface of the plastic, allowing the pieces to bond as the solvent evaporates.
Apply solvent - use a pipette to carefully drip some solvent in between the surfaces to be joined. The solvent spreads by capillary action. (See image below, majority of the text is too advances). Usually schools use Tensol cement
Join pieces - Press the pieces together while the solvent is still wet
Allow to dry - let the joint dry completely
Applications - often used for joining PVC pipes and other plastic fittings. Used in school projects to join Acrylic
Safety tips
- use in a well ventilated area- Solvents can be harmful if inhaled
- use gloves and safety glasses
Test yourself
More on Manufacturing - tools and processes
Find out more by working through a topic
- count3 of 7
- count6 of 7