Key points
Manufacturing workshops provide access to a wide range of tools and machines to manufacture products.
Workshop tools and machines, used safely, can be used to mark, cut, shape, form and finish materials to a high standard.
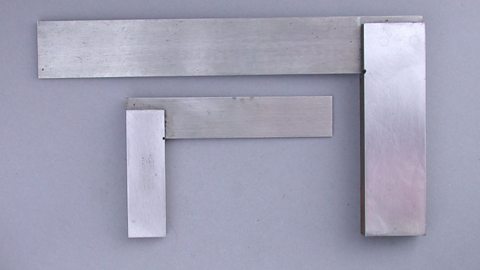
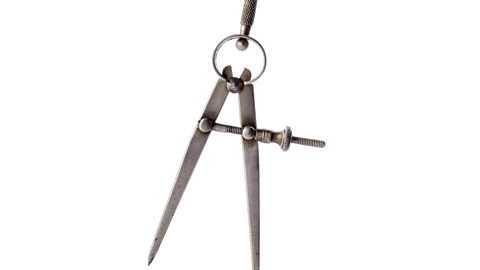
Accuracy tools ensure measurements meet specifications.
Saws and drills cater to various cutting needs.
Safety gear is essential for operating machines.
Files and marking tools assist with precision work.
Accuracy, Tolerance and Quality Control
In a workshop, precision is important for making good-quality items. Accuracy, tolerance, and quality control help ensure every cut and measurement is correct. Using tools like saws, callipers, and micrometers, you can check that your work matches the required dimensions and tolerances, keeping everything consistent and excellent.
Accuracy refers to how close a measurement or dimension is to the intended or desired value. When using a saw to cut wood, accuracy means making sure the cut is exactly where you want it, matching the measurements on your plan.
Tolerance represents the range within which a dimension can vary while still being acceptable. If a part should be 100 mm in diameter with a tolerance of ±1 mm, it means the part can be between 99 mm and 101 mm and still be considered correct.
Use measuring tools like callipers or micrometers to check the dimensions of the workpiece after processing. Compare these dimensions to the required accuracy and tolerance to ensure the work meets the specifications.
Quality Control — regularly measure and inspect workpieces during and after processing to ensure that both accuracy and tolerance are maintained throughout the project.
Saws and drills you will find in a workshop
These are the four most common saws found in the workshop.
A Tenon Saw: Mainly used for cutting straight lines with accuracy. They are used to cut wood, both hardwoods and softwoods.
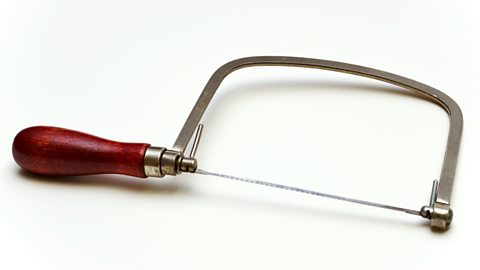
A Coping Saw: Used for cutting thinner pieces of material and can even deal with cutting curves. They can be used to cut metals, plastics and wood.
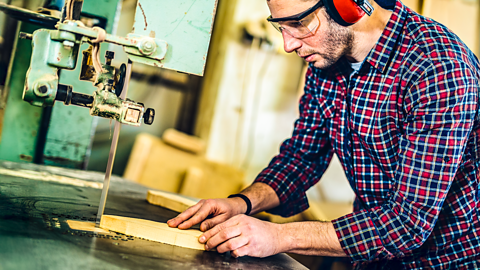
A Scroll saw - is often used to cut intricate patterns or shapes when required. It can also be used to cut metals, plastics and wood.
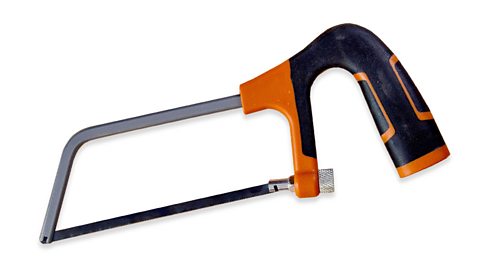
Lastly there is the hack saw and even a junior hacksaw: these are most commonly used to cut thin pieces of metal or plastic.
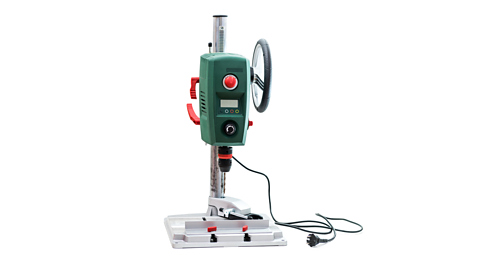
These are examples of the most commonly used drills in the workshop.
A pillar drill: This is the biggest and probably most commonly used drill in the workshop. It can be used on a range of materials and is very accurate.
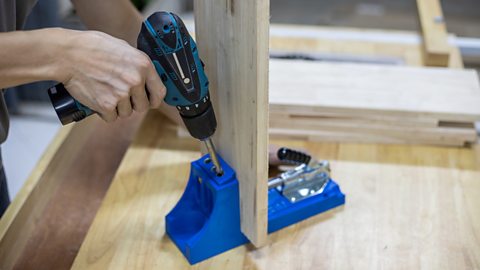
A cordless drill is another very common drill. It can be used on a range of different materials and is made to be easily moved.
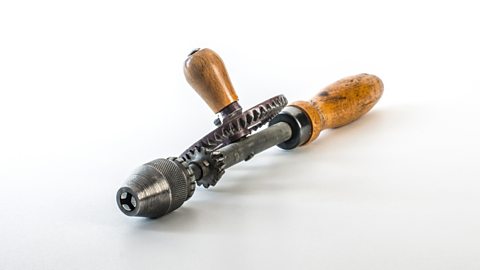
Lastly there is the hand drill. Hand drills are powered by turning the handle on the side. This means you have a lot more control over the speed of the drill. However, it requires a lot more effort than the others.
You may also have noticed a small desk top drill that can be used for drilling the holes into PCB boards.
These are examples of the most commonly used drill bits in the workshop.
A Flat bit is used to make small to medium-sized holes in a range of materials.To make a bigger hole a forstner bit is more commonly used.
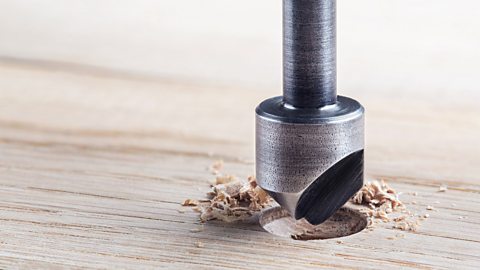
A counter sunk bit is another commonly used drill bit. This drill bit leaves space for a flat head screw to remain flush with the material.
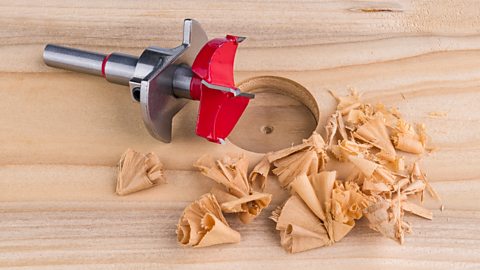
Lastly you have the hole cutter bit. This bit allows a user to bore out a circular hole of wider diameter than most standard bits would typically create.
Saws
There are a great many saws used to cut timber - some suit long straight cuts on thicker planks, and others suit curves and complex shapes:
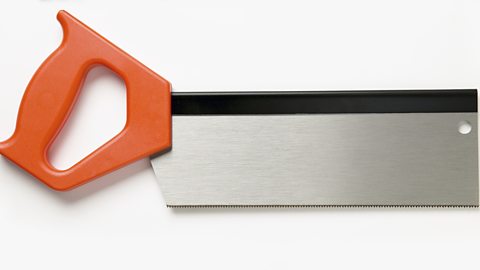
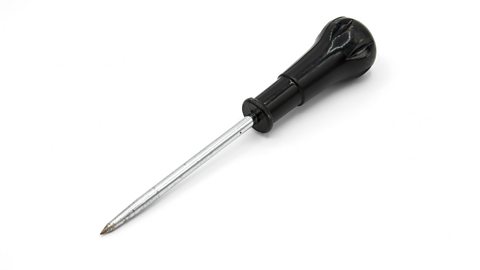
Image caption, A tenon saw is a hand tool used for making precise, straight cuts in wood. A saw with a thin, straight blade and a reinforced back for stability. Ideal for cutting accurate joints and details in woodworking projects that require clean, straight cuts.
1 of 4
Drills
Instructions on using the various drills and drill bits you might find in a workshop
Drills are one of the most common tools found in any workshop. Drills are tools generally used for making holes in a range of different materials. They can however also be used to drive fasteners into the material. Different drill bits can be used to achieve different outcomes.
Your first step as always should be to choose the correct PPE.
Safety glasses will protect your eyes from any dust or debris.
Ear protection can protect your ears from the noise of the machine.
Lastly ensure your hair is tied back if necessary and any loose clothing is secured. An apron can also add another layer of protection and help protect your clothes from dust.
The cordless drill and hand drill are the two most common handheld drills found in the workshop.
The pillar drill would however be the most commonly used drill.
Pictured here are the range of different drill bits that can generally be found in the workshop.
It’s important before you begin drilling into your material that you firstly mark out where you would like to place the holes. You can use a marker to make small guide holes on the material. This will ensure you make your hole in the correct place.
Hand drills aren't as commonly used any more but can still be useful when a lot of precision and control are required. You simply need to place the drill bit where you would like to make the hole and use the handle on the side to turn the drill bit.
Cordless drills can be used very similarly to a handheld drill. They can be used to make a simple hole using a (need to confirm name) bit. A range of different drill bits can also be attached to achieve different outcomes. The example here is a countersink drill bit. The drill bit removes extra material allowing a flathead screw to sit flush against the material.
When using the pillar drill, the first thing to consider is if you have the correct drill bit attached. It's simple to change the drill bit. You can use the chuck key to loosen the jaws holding the bit in place. Once you have changed the bit you simply use the same chuck key to tighten the jaws around the new drill bit.
Before turning on the drill make sure you have the guard in place. Also make sure the material you plan to drill is securely held in place. This can be done with clamps.
You are then ready to drill. Simply use the handles on the side of the machines to slowly lower the drill to the required height.
Then turn the handle in the opposite direction to bring the drill back to its original position.
Then turn the drill off before removing the material you have drilled.
This next drill bit shown is known as a forstner bit. This drill bit can be useful when you need to drill a bigger hole into something. In this first example the drill bit is used to drill a large circumference hole into the piece of wood.
However, you can also use this bit to drill out a precise, flat-bottomed hole in a material.
An example of which is shown here.
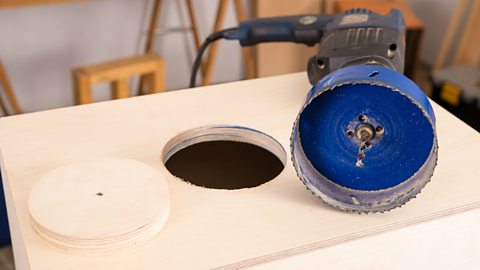
The last example of drill bits is a wood plug cutter drill bit. This is not quite as common a drill bit as the previous ones shown so far. They are used to cut out wooden dowels from a piece of wood. These would be very time-consuming to create in a different way, so this drill bit is very useful when creating wooden dowels.
These are the dowels and the holes in the material you are left with when using this drill bit.
When using metal instead of wood it is extra important to secure your material. Using a machine clamp can be very useful for properly securing your work.
It is advised to move more slowly when working with metal.
There is a danger that the material and the drill bit can heat up quite significantly when using the pillar drill. To combat this you can use some oil/lubricant to help reduce the build up of heat. This should allow the process to run a lot more smoothly.
Always make sure to turn off the machine before retrieving your work.
Woodworkers employ a range of drills to create specific holes: hand drills for basic tasks, power drills for general use and pillar drills for accurate, vertical holes.
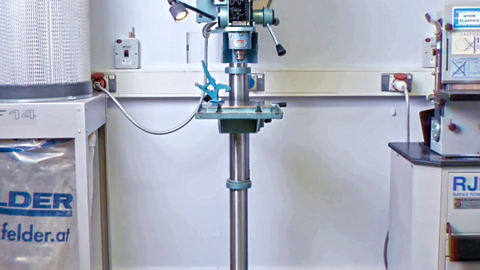
Image caption, A pillar drill, also known as a pedestal drill is a machine used for drilling precise holes. A stationary drill with a vertical column that holds the drill bit in place. It allows for accurate drilling at various depths and angles, making it ideal for repetitive or precise tasks.
1 of 4
Drill bits
Wood drill bits vary, from general twist bits to specialised Forstner bits, each designed for specific hole sizes and finishes.

Image caption, A flat bit is a drill bit with a flat, spade shaped cutting edge. Ideal for drilling wide, flat bottomed holes in wood quickly.
1 of 4
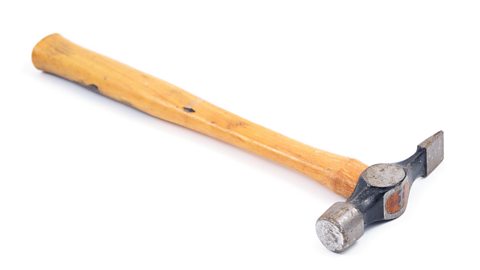
Hammers
There are many kinds of hammer: claw hammers for general nailing and nail removal, pin hammers for delicate, precise work, and ball pein hammers for shaping and striking metal.
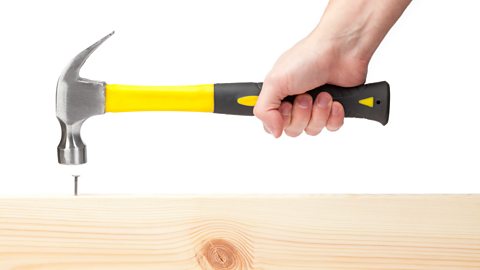
Image caption, A claw hammer has a flat striking face on one side and two curved claws on the other. Used for driving nails into wood and for pulling nails out with the claws.

1 of 3
Woodworking tools
How to plane wood, safely
A wood planer is a tool used to smooth or level wooden surfaces. Follow these steps to use a wood planer safely and effectively.
Ensure you have a clean, well lit, safe workspace and then gather your tools
Inspect the planer to make sure it’s in good condition.
Ensure the blades are sharp and clean
Set the depth of the cut using the depth adjustment knob. Start with a shallow setting to avoid taking off too much material at once.
Secure the wood firmly using clamps or a workbench to prevent movement
Stand comfortably with your feet apart for balance.
Hold the planer with both hands. One hand on the handle, and the other on the front grip.
Move the planer smoothly along the wood surface, maintaining a steady speed.
Use long, even strokes, letting the planer do the work. Don’t force it.
Keep the planer flat on the surface to avoid gouging the wood.
For best results, move in the direction of the wood grain.
Clean the planer and the work area of sawdust.
Check the surface to ensure that it’s smooth enough. If it’s not, adjust the depth and continue planing.
After checking your work to make sure you’ve achieved the desired effect, store the planer in a safe place with the blades properly covered to avoid accidents.
| What it is | What it looks like | When it is used |
|---|---|---|
| Hand plane | A hand plane is a woodworking tool used to smooth and shape wood. It has a flat base with a sharp blade that shaves off thin layers of wood. | The user pushes or pulls the plane across the wood surface to make it level or to shape the wood to a desired contour. It's useful for creating a smooth finish or adjusting the thickness of wood pieces. |

| What it is | What it looks like | When it is used |
|---|---|---|
| Wood chisel | A wood chisel is a tool used for carving or shaping wood. It has a sharp, flat blade with a beveled edge that allows it to cut into the wood. | The chisel is typically used to remove excess material and create wood joints. |
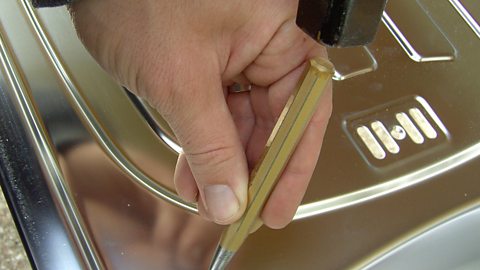
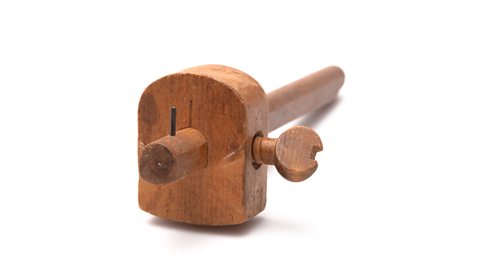
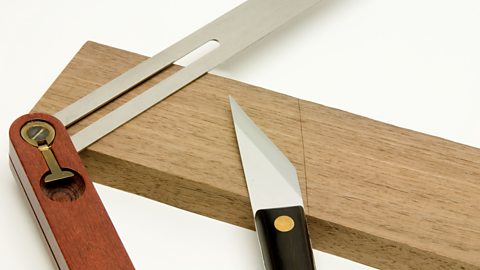
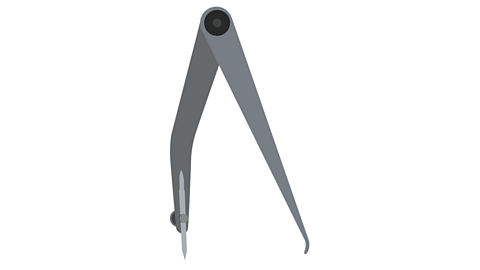
Marking out
Accurate layout and measurement are key to precise work. Tools like scribes, rulers, and gauges guide cuts to match designs.
Marking and scribing tools
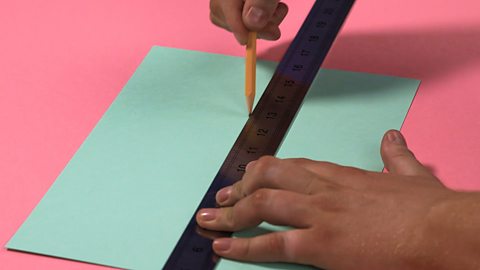
Image caption, Pencils can be used for drawing and marking lines on materials.

1 of 7
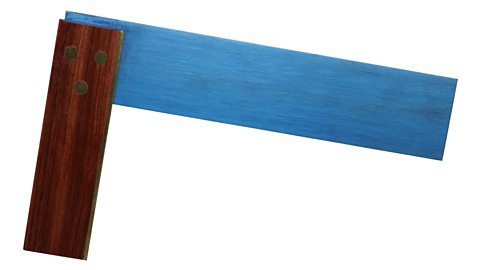
Layout tools and straight edges
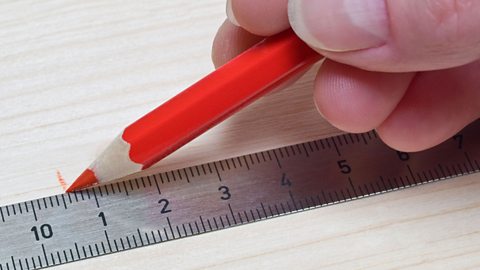
Image caption, A steel rule is a straight edge for measuring and drawing accurate lines.
1 of 7
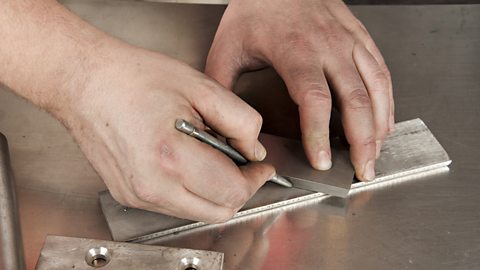
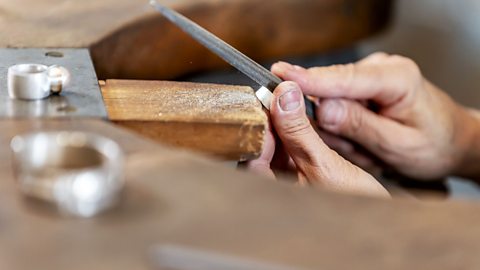
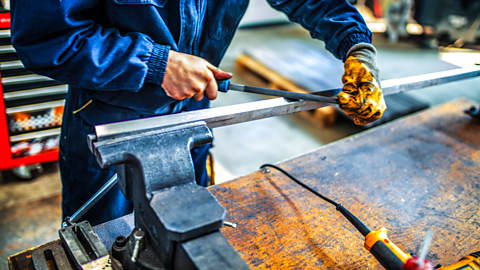
Files
Files shape materials by removing small amounts, creating varied finishes. Their shapes—flat, round, half-round, suit different contours and edges.
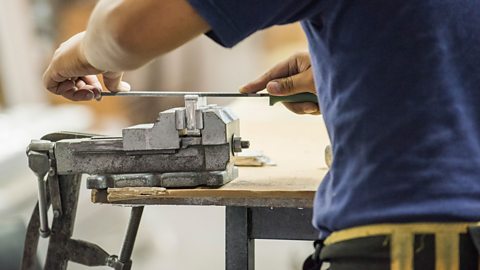
Image caption, A flat file features a broad, flat working face and is used to smooth or shape flat surfaces.
1 of 3
Bandfacer/Linisher
A bandfacer, also known as a linisher, is a machine with a continuous loop of abrasive belt. It’s used for smoothing and shaping materials, usually plastic and wood.
How it is used
- feed the material against the moving belt to smooth or shape it. Keep the material moving to avoid overheating or uneven sanding
- you can adjust the angle of the belt or the table to get the desired finish.
Health and Safety (H&S)
- always wear safety glasses to protect your eyes from debris and dust
- wear an apron to protect your clothes
- keep your work flat on the tabletop
- only one person allowed to use the machine at a time
The correct way to use a bandfacer (or linisher)
A bandfacer is a machine that uses a large loop of sandpaper, running at high speed to shape or smooth the edges of your work. It is most commonly used with wood and plastic.
Your first step as always should be to choose the correct PPE.
Safety glasses will protect your eyes from any dust or debris.
Ear protection can protect your ears from the noise of the machine.
Lastly ensure your hair is tied back if necessary and any loose clothing is secured. An apron can also add another layer of protection and help protect your clothes from dust.
Your first step should be to familiarise yourself with the bandfacer.
The sandpaper belt is the part of the machine that you shape your work against.
Take note of any safety signage that is in place and make sure you comply with it.
Locate the on and off button.
As well as the closest emergency stop to the machine.
There should also be a stop button that can be operated with your foot or in this case your knee. This allows you to shut off the machine safely without needing to use your hands.
Angle guides can also be used to help ensure a precise result.
Once you have familiarised yourself with the machine and your work area, before turning on the machine you should first adjust the safety guard. You should only expose as little of the sandpaper belt as required. This will help prevent the machine pulling the piece of work out of your control. This is done by loosening the screws holding it in place and then sliding it up or down. Then securing it in place again.
You are now ready to begin. Turn on your machine and place your work on the shelf. Then slowly press your material against the sandpaper belt. You can move the material about on the shelf to ensure you get the required shape to your work. Moving slowly will allow you to have more control over the amount of material that is removed and the final shape of your work.
Wood and plastic are the two materials that a bandfacer is best suited to working with.
You can also change the angle of the shelf your work sits on. This can make getting a certain angle to an edge much easier and repeatable.
Make sure to turn off the machine once you have finished working with it.
Pedestal polisher
A pedestal polisher is a stationary machine used for polishing and buffing metal or other materials. It consists of a motor mounted on a pedestal with one or two rotating polishing wheels or buffing pads attached.
How it is used
- hold the material against the spinning wheel or pad to polish it
- move the material around to ensure an even polish and prevent overheating
Health and Safety (H&S)
- always wear safety glasses to protect your eyes against flying debris and dust
- wear an apron over your uniform as loose items that could get caught in the machine
- only one person is allowed to use the machine at a time
The best way to use a pedestal polisher machine
A pedestal polisher is a power tool used to smooth and polish metal, wood, or other materials by rotating abrasive wheels on a fixed stand.
Ensure you are working in a clean, well-lit and safe workspace.
Prepare your PPE.
Safety glasses will protect your eyes from dust or debris.
Ear guards will protect against the noise of the machine.
Ensure your hair is tied back, if necessary, and any loose clothing is secured.
Before beginning, make sure you know where the emergency stops are for the machine
Switch on the pedestal polisher and add soap to the polishing mop (is this a mop or a wheel?).
Adjust the speed of the polisher according to the material you are polishing.
Optional: Slower speeds are ideal for delicate materials, while faster speeds work best for tougher surfaces
Hold your material at this angle (this will prevent it from being thrown at you)
Carefully, bring your material into contact with the polishing wheel.
Move it smoothly across the wheel, applying light pressure.
Let the wheel do the work: don’t press too hard.
The second wheel is then used to buff what’s just been polished.
Follow the same steps as before: carefully make contact with the wheel, apply light pressure, and keep the material moving.
Turn off the polisher by using the emergency stop button.
Inspect your material to ensure you have achieved your desired finish.
Wipe down the machine and surrounding area to clear any dust or debris.
Wood lathe
A wood lathe is a machine used for shaping and carving wood. It holds a piece of wood securely while rotating it at high speeds, allowing tools to carve or shape the wood into various forms.
How to turn wood on a lathe
Woodturning is the craft of using a wood lathe with hand-held tools to cut a shape that is symmetrical around the axis of rotation.
In the video, you can see everything you will need to start wood turning.
In terms of PPE, a face shield is required to provide the best protection while working.
The lathe is the machine that will actually turn the wood.
The chisels and gouges are the tools that you use to shape the wood. They are shaped slightly differently to produce different shapes or ways of removing material.
Before attaching the wood to the lathe, it is important to prepare the wood first.
Marking up the wood to find the centre point of the wood is an important first step. This will ensure the wood is turning around the middle of the wood, meaning it will be more stable and easier to work with.
You can also cut small sections into the wood to make sure the lathe can grip the wood properly.
If you are working with a square piece of wood like our example, it is also advised to plane down the corners.
This will not only save time when turning it, but also make it much easier to work with. Ensuring a better final product.
You are now ready to attach the wood to the lathe. Firstly take one side of the wood and, using a hammer to secure, attach the wood to the lathe.
You should use the centre point you marked out earlier as the guild to attach to the lathe. Making sure that the piece is as centred as possible will mean that the wood is much more stable when turning.
You can then move the other section of the lathe in place. Firstly sliding it up to the wood and then using the handle to secure it tightly in place. Make sure the wood is secure before moving on to the next step.
You can then move the tool rest (not sure if correct name) into place. You can use this to rest the chisel/gouge on while turning the wood. This should help give you more control over the process.
Once it is in place, you should manually turn the piece of wood round to make sure the wood doesn't come in contact with the tool rest.
Lastly, before getting started make sure to put on all pieces of PPE. The most important in this case being your face shield. This will stop anything flying off and striking your eyes or face.
You are now ready to begin.
Turn the lathe on, making sure that the wood is stable before starting.
Then resting your tool on the rest, you can begin to press your gouge into the wood.
This will begin to remove material from the piece.
The video shows the correct position to hold your hands on the tool. This should give you the best control over the tool when working.
You can then change tool depending on the shape you are trying to achieve.
Once you are happy with the shape of your piece, you can then use a piece of sandpaper to smooth the wood.
The lathe can make this process much quicker than having to do it manually.
The second example uses much the same process.
The piece of wood in this example is already circular and so doesn't need to have any edges shaved down.
The second example shows some other shapes that can be created using a lathe.
Each of the gouges/chisels will be useful for creating different shapes.
It's important to know what shape you are trying to create before you start.
Again, once you are happy with the shape it is advisable to use the lathe to start the sanding process.
By simply holding the same paper against the moving wood, a lot of rougher edges can be smoothed out.
Leaving you with a much nicer finish and feel to the wood.
How it is used
- secure the wood piece in the lathe’s chuck or between centers
- adjust the tool rest and position the cutting tool
- turn on the lathe and adjust the speed according to the wood type and cutting requirements
- use the cutting tool to shape the rotating wood into desired forms, such as spindles or bowls
- after shaping, sand and finish the wood to smoothen the surface
Health and Safety (H&S)
- wear safety goggles to protect your eyes against debris and dust
- avoid loose clothing and secure long hair to prevent entanglement with the rotating wood
- ensure proper training on operating the lathe to prevent accidents and misuse
- regularly check and maintain tools for sharpness and functionality
- keep the work area clean and organised to avoid slips and ensure safe operation
Metal lathe
A metal lathe is a machine used for shaping metal. It holds a metal workpiece securely in a chuck while rotating it at high speeds, allowing various cutting tools to shape or finish the metal.
How metal lathes work
How it is used
- mount the metal workpiece on the lathe’s chuck or between centers
- align and secure it properly
- select the appropriate cutting tools and speed settings
- as the lathe rotates the metal, use the cutting tools to remove material, creating precise shapes and finishes
- adjust the tool rest and settings as needed for different operations (turning, facing, threading)
- after the desired shape is achieved, perform additional finishing operations such as sanding or polishing if necessary
Health and Safety (H&S)
- wear safety goggles to protect your eyes against Fine particles or filings of metal or other material produced by a machine
- avoid loose clothing and secure long hair to prevent entanglement with the rotating metal
- ensure proper training on operating the lathe to prevent accidents and misuse
- regularly check and maintain tools for sharpness and functionality
- keep the work area clean and organised to avoid slips and ensure safe operation
Test yourself
More on Manufacturing - tools and processes
Find out more by working through a topic
- count3 of 7