What are the key points about selecting materials?
- When selecting materials and surface finishes for a product, consider its intended use and the required properties like strength, durability and appearance.
- Finishes protect and improve product appearance.
- Wood can be painted, stained, oiled, varnished, or veneered.
- Metal finishes include painting, dip coating, powder coating, lacquering, and galvanising.
- Plastic finishing involves smoothing, printing, engraving, and vinyl cutting.
It might be useful to look at What are the properties and applications of wood and plastics? and What are the properties and applications of metals, alloys and graphene? before studying this topic.
Surface finishes
Surface finishes are applied to materials to improve appearance, protect against corrosion and wear and enhance durability. They can also reduce friction, improve electrical conductivity and make cleaning easier, depending on the product’s intended use.
The table below outlines the different finishes that can be applied to each type of material.
| wood | metal | plastic | |
|---|---|---|---|
| paint | ✔ | ✔ | |
| polish | ✔ | ✔ | |
| plastic dip coat | ✔ | ||
| galvanising | ✔ | ||
| varnish | ✔ | ||
| oil | ✔ |
Wood
Timber can be treated in a variety of different ways and for a variety of different reasons:
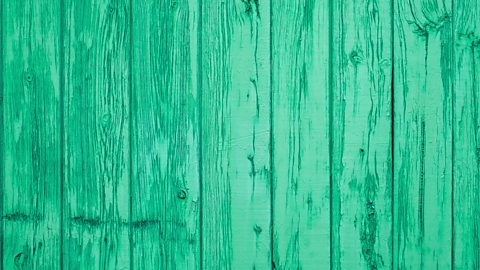
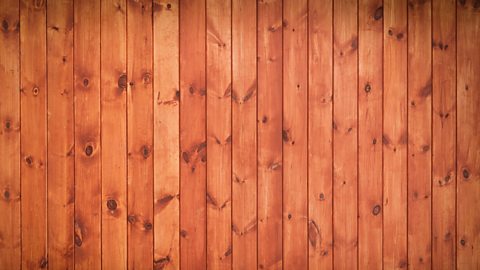
Image caption, Painted timber
1 of 4
Paint
Paint gives colour to the timber and can protect the timber if it is going to go outside. Some paint provides a solid colour - this is called opaque. If the paint is translucent, you can see the grain is visible through the colour. Paints are either shiny, dull and flat without shine, sometimes spelled matte or Between gloss and matt, sometimes known as semi-matt or eggshell.
Wood stain
Wood stain is applied so that the appearance of the timber is enhanced. It is possible to buy many wood stains that are designed to look like a different wood type. Wood stain gives some protection to the timber, but an additional coat of varnish after staining is often a good idea.
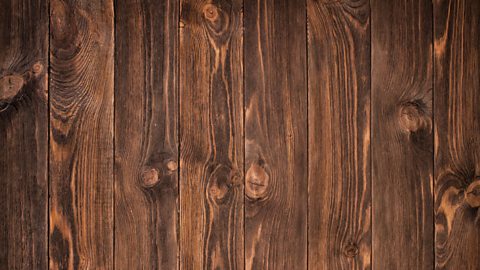
Oil and wax
Oil and wax soak into timber and can be used to enhance the natural appearance of the timber. Often kitchen worktops and chopping boards are oiled or waxed so that the surface repels water.
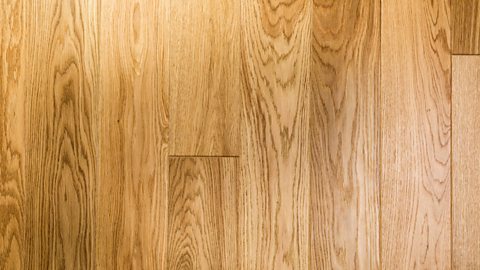
Varnish
Varnish can be applied to timber so that a shiny appearance is achieved. Varnish is usually applied in many layers, so the varnish is durable. Varnish can be glossy or matt depending on the type used.
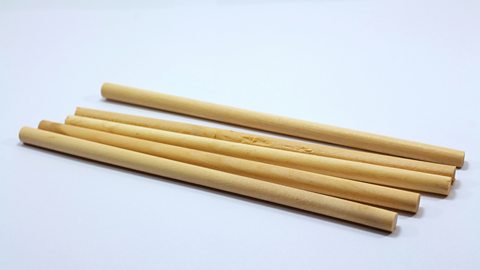
Veneering
A veneer is a thin layer of wood that can be applied to cheaper materials such as medium-density fibreboard (MDF) or chipboard to make them appear more expensive. A finish will then need to be applied to the veneer.
Finishing wood
All wooden items and components have to be finished in order to seal and protect the surface of the wood.
Before you get started here are some things you're going to need:
Glass paper in a variety of grit sizes, a metal rule, a selection of wood oils with a cloth or sponge, some wax, wood stain, varnish or lacquer, and goggles and a dust-mask.
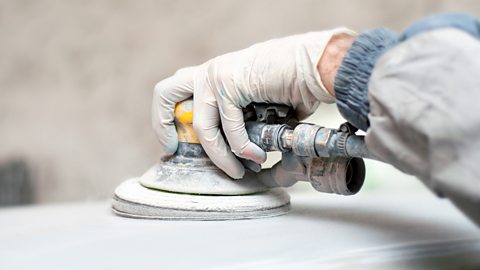
The process of finishing wood usually comes down to sanding and that can take longer than you think, so you'll need to be patient.
Like any abrasive process, sanding is about gradually removing smaller and smaller layers of the surface until it's completely smooth.
You'll need to do this in stages, using a few different types of glass paper of progressively finer grades.
Each stage removes the scratches left by the previous grades to give a smooth and even finish.
To start, get your dust-mask and goggles on and start smoothing with an 80 grit glass paper, then move on to a 120 grit, finally a 240 grit.
Remember to sand in the direction of the grain for a smooth finish. For larger flat surfaces you can get great results with an electric sander.
Now you've got a smooth finish you need to protect the wood, you could paint it, but you would lose the grain.
So here are three options that will protect and enhance the wood.
Wood oils, like teak oil, Danish oil or linseed oil, soak into and seal the wood, enhancing the grain.
You should apply oils directly to the wood with a cloth or sponge.
Wax will enhance the natural colour and grain of the wood and leave you with a satin or high-shine finish.
There are natural and chemical waxes, but both get the same result.
Applied with a soft cloth, or tissue, they are absorbed by the wood and, when they dry, they seal the grain against water or moisture.
And finally, you can stain the wood using a coloured, water-based stain to coat the surface. It soaks into the grain and then dries.
You should then seal the wood with a varnish or lacquer.
There are two types of varnish: water-based and chemical-based.
Water based varnishes are easiest to use, simply apply three coats, sanding between each one.
Metal
As with most materials, surface preparation is important before applying a finish. Oil and grease need to be removed beforepainting, and dents and scratches need to be filled and rubbed down with an abrasive cloth used for finishing and cleaning by rubbing or grinding the surface, it is coated with corundum and magnetite or an abrasive paper made of silicon carbide particles on paper backing.
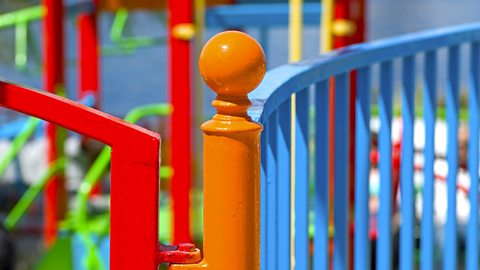
Painting
Paint is a common finish applied to bare metal surfaces. Once the surface is smooth the painting process can start, very much like painting timber.
Dip coating
Dip coating is a popular finish for the handles of many tools and coat hooks. Heated metal is dipped into powdered or a liquid polymer so that a coating of the polymer is bonded to the metal. It is available in many colours and can help improve grip when applied to tool handles.
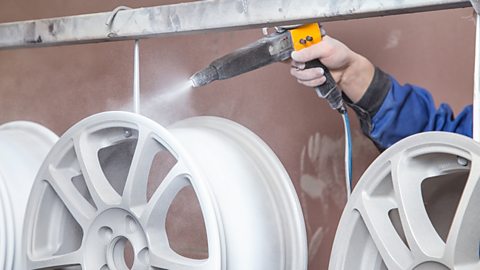
Powder coating
Powder coating is a method of attracting paint in a powder form towards an electrically charged object:
- paint that is in powder form is sprayed from a paint gun
- the paint is attracted to the electrically charged object
- a fine and even coat of powdered paint covers the surface of the product and, once heated, the powder melts and produces a ‘run free’ paint finish
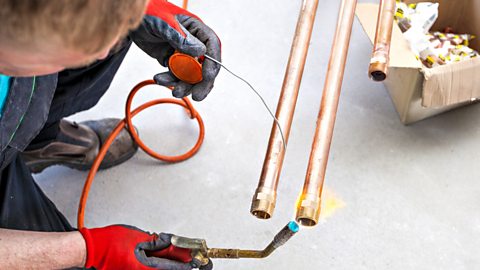
Lacquering
Lacquering is a method of applying a clear varnish that prevents the metal rusting or oxidising while allowing the natural finish of the metal to be on show.
Galvanising
Some metal products that are made from A ferrous metal made of iron with small amounts of carbon to increase the strength., such as watering cans and lamp posts, would An orange coloured, flaky coating of Iron oxide formed on iron or steel. It is caused by the iron reacting with oxygen. if they were not protected.
A common process that is used to protect such products is galvanising . Steel products are given a A silver metal used to coat iron or steel as a protection or sacrificial coating. coating by dipping them into the molten zinc. For example, corrugated steel roofs of farm buildings and sheds are often made from steel that has been galvanised. After a few decades, the galvanised coating will wear because of acid in the rain and the steel will start to rust, so the roof will need replacing one day.
Finishing Metal
It's important to treat the surface of components made from metal to stop them changing colour and becoming damaged. Aluminium will oxidise, turning the surface grey rather than shiny; steel will rust; and copper will also oxidise and turn turquoise in colour.
Before you get started here are some things you'll need depending on the finish you want to achieve:
Some lacquer
Various grades of emery cloth and wire wool
Red oxide
Primer and paint
Plastic powder
And some hotwork gloves, apron, goggles and a dust mask.
Copper and aluminium are usually lacquered to prevent their surfaces oxidising and to preserve their aesthetics.
Steel can be lacquered too, but you can also get some really great finishes using other techniques.
Always start by removing any oxidisation or scale from the surface of the steel. You might need to use a grinder for this, but a combination of emery cloth and wire wool should prepare most surfaces ready for finishing.
Before applying any finishes, always make sure the surface is dry and free from oil or moisture.
Painting steel works well and you can choose whatever colour you want for your finish.
Begin by painting the metal with red oxide paint to prevent it rusting.
Once the surface is dry, you can apply a primer or go straight to painting. You can use brushes or aerosol sprays. Just be sure to use your mask for those.
Another option is to apply a plastic coating to your steel. To do this, you'll need to melt a plastic powder onto the surface of the steel.
It's important that you don't touch the plastic powder or the surface of the metal throughout this process, so you'll need to drill a hole in your component so you can hang it on a wire hook.
One option is to heat the metal component in an oven first. The oven should be set to 160 degrees centigrade and your metal component will need to stay in for five to ten minutes.
Once the steel is up to temperature, leave it in for a few extra minutes to ensure that its heated evenly with no cooler spots.
Now use your hook to remove it from the oven and lower it into a fluidised bath. This allows the plastic powder to evenly coat the surface of the steel.
Now you can remove your component and hang it to cool.
There are plenty of options to choose from with metal finishes, so you should decide which is best for your metal item by thinking about what you want to use it for when it's finished.
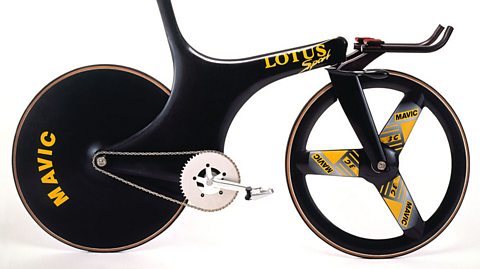
Plastic
Some Plastics are long chains of polymers. A polymer is a large molecule formed from many identical smaller molecules (monomers). Polymers can be natural or synthetic. that are formed in a A hollow container used to give shape to molten materials. are self-finishing, meaning that the inside surface of the mould is so smooth that the form that is taken from it is also smooth. A motorbike helmet is a good example - the helmet's outside is smooth because the mould it was made in was also smooth.
Once a polymer has been cut or shaped, the edge that has been cut can be rough and will need to be finished.
Using acrylic as an example:
- a The outside edge of a shape. is likely to be marked on the acrylic
- a cut that is close to the line will be made with a saw of choice
- a file can be used to remove more acrylic, so the profile is closer to the line
- abrasive paper, often called A waterproof abrasive paper with latex-bonded silicon carbide. It can be used either wet and dry. Using it wet reduces friction, produces less dust and may help prevent scratches. is then used to remove the file marks from the acrylic, known as ‘rubbing down’
- once the file marks are removed, a fine abrasive paper can be used to achieve a matt finish
- if a gloss finish is required, then an electric buffer or car body polish can transform the matt finish into a glossy one
Sublimation printing
It is possible to add a personalised pattern to a polymer using a sublimation printer, which can look like a regular inkjet printer but has A machine that prints using dye suspended in a liquid for printing on to hard surfaces. in the printer cartridges
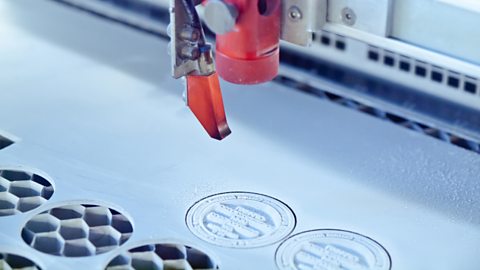
Laser engraving
A laser cutter uses a laser beam to vaporise material and cut out shapes very accurately. It can cut through materials or, if the power settings are lowered and the speed increased, it can engrave the surface to add text or an image.
Vinyl cutting
Vinyl cutters can be used to cut sheets of self-adhesive vinyl, which can be used for signs on cars, vans and shop fronts. The sheet vinyl is available in many colours and is bought on a roll. A vinyl cutter is a computer-controlled machine - the cutting tools moves along Made up of paths defined by mathematical equations, rather than dots. Vectors can be enlarged without losing clarity. , which have been set out within the design. Long signs can be cut as the vinyl is on a roll that feeds into the machine.
Finishing plastic
There are a few things you can do to give a polished finish to any plastic component, no matter how it's been shaped or cut.
Before you get started, here are some of the things you're going to need:
A selection of files
A metal rule
A range of wet and dry paper
A wax polishing wheel and some wax
A blowtorch
Some hot work gloves, apron and goggles
And finally, a face shield
Like all abrasive processes, the idea is to start with more abrasive tools and materials, and then, step by step, use less abrasive techniques until you're happy with the finish.
Flatten rough edges by cross-filing. Push the file across and along the surface until its feels flat to touch.
Keep the file flat to the workbench to make sure the edges are square.
To file a curve, start with the file flat on one edge, then run it along the curve, finishing with it flat on the other edge.
At this stage, you will have marks from the filing which you should remove with a steel rule or scraper.
To get a good near-polished finish, you will now need to use wet and dry paper.
Wet the paper with a little water to reduce friction.
Start with a 280 grit, then move on to 600 grit, and finally 1200 grit.
Remember, that the higher the grit number, the finer the finish.
After this the surface should feel very smooth.
To achieve a high polish finish you now have two options.
The most common way is to use a wax polishing wheel and you'll need your goggles or face shield and gloves for this.
Apply the wax to the cloth wheel.
Then working from the centre towards the corners, use the machine to polish the edges.
Be careful here not to snag the cloth on the corners.
Re-apply the wax to the wheel every 30 seconds or so to avoid excessive friction which could melt the edges.
If you are polishing high impact polystyrene, you will need to take extra care. It has a much lower softening point than acrylic and so is more likely to melt with excessive friction.
Finally, remove any remaining wax with the polishing mop.
You can get a really clear glass-like finish by flame polishing your plastic edges.
For this process, you will need to put on your hot work protective gloves, apron and a face shield.
This option will only work for acrylic. Flame polishing cannot be used to finish high impact polystyrene.
We are using a blowtorch here but you can get the same result with a brazing torch or an oxy acetylene torch. It is a very quick and simple process and gives a great finish to your plastic.

Protect and Perfect!
Finishes are usually applied to products for two reasons:
- To protect them (e.g. from rusting/rotting)
- To make them look more aesthetically pleasing.
Test yourself
More on Materials, components and fabrication
Find out more by working through a topic
- count2 of 8
- count3 of 8
- count4 of 8
- count5 of 8