It's important to mark out your design on metal before you begin cutting. It allows you to clearly see where you're cutting and helps to keep the final cut accurate.
Before we get started here are some things you'll need:
Your metal sheet
Some engineer's blue or marking-out dye and brush
A steel rule and scriber
A set of odd leg calipers
A centre punch and hammer
An engineer's square
Some dividers
And a dust mask.
Make sure the surface of your metal is clean of all oil and scale. White spirit will remove any oil, and wire wool will help to remove scale, and a file will smooth off the edges.
Start by coating the surface of the metal with marking-out dye, which will ensure the scratched lines will show up clearly.
Once that's dry you're ready to start marking out your design.
Straight lines of a design can be scratched with a scriber and steel rule.
Lines parallel to an edge should be scratched using odd-leg calipers.
Set the calipers by placing the hooked leg onto the zero end of a steel rule and aligning the point of the second leg with your required measurement. In this example that's 25mm.
A curved line is drawn by first scratching a cross at the centre of the radius.
Then use a centre punch and hammer to make a small dent.
The dent is going to prevent the standing leg of your dividers from slipping and keep your curve uniform.
Now set your dividers to the right measurement for the radius. Place one leg in the dent and then use the second leg to scratch the curve.
If your design requires holes to be drilled, mark the centre of the hole with a cross using your steel rule and odd leg calipers. An indent at the centre of the hole is then made using a hammer and centre punch.
You can now see how the scratches stand out against the blue dye, making it easy to see your design.
It's a good idea to 'hatch in' areas of the metal that you plan to cut off. It helps make things clearer when you start cutting your metal.
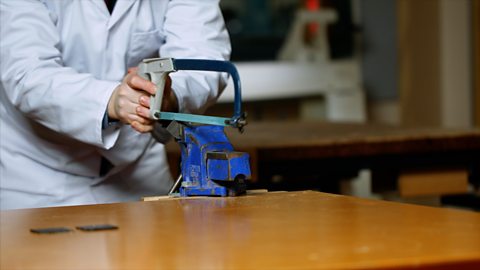
And you're ready to start cutting.
Check out 'Explain This… Cutting a shape from metal' for what to do next.
Video summary
This short film demonstrates a variety of techniques that can be used to mark out most shapes on metal.
These techniques can be used for a huge range of RMT, product design and engineering applications and across many D&T projects.
Teacher Notes
Points for discussion
- The differences and similarities between marking on metal and on wood and plastics.
- The importance of accurate marking out as a basis for project quality control.
- Are there any differences between marking out on steel as opposed to, for example, copper, aluminium or brass?
- How can techniques from other disciplines, for example maths or art and design, be used to mark out more complex shapes on a metal?
- How can we use templates to mark out on repeated pieces of material to batch produce identical components?
- How, ideally, might you use a CAD/CAM method like laser cutting or CNC plasma cutting, to produce similar items commercially?
Suggested activities
Marking out on metal is used in the manufacturing process of a huge range of metal-based items and components, for example:
- Garden tool blades and tangs
- A bottle opener, FPT tool or a more open-ended multi-tool design and manufacture project
- Candle holders
- Ornamental ironwork and jewellery
- A whole range of potential components for lighting projects
- Tool-making projects
- A huge range of components that can be made for KS4 D&T coursework
Suitable for teaching design and technology (D&T) at KS3/KS4 in England, Wales and Northern Ireland, and 3rd/4th levels in Scotland.
Drape forming. video
This short film explains the process of drape forming, which is used to create curved or more complex shapes out of plastic.
Cutting a shape from metal. video
This short film explains the different ways to cut metal, depending on your design.
Drape forming. video
This short film explains the process of drape forming, which is used to create curved or more complex shapes out of plastic.
