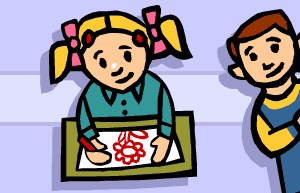
Decorating a plant pot not only opens children's eyes to art and design in the garden, it teaches them about preparation and cleaning up too. Go potty!
Decorating a plant pot not only opens children's eyes to art and design in the garden, it teaches them about preparation and cleaning up too. Go potty!
The painting takes little time (10 to 15 minutes). Plan something to occupy the children during the drying time (the first coat shouldn't take long - probably the time it will take to clean the brush with them. The decoration will take longer and depend on the paint you use).
 1 Cover your work surface with old newspaper, and ensure your children are wearing old clothes or a painting apron.
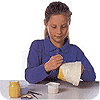
2 Now they're ready to paint their pot with a base coat of emulsion. They don't need to paint the base, and only need to paint inside down to the bottom of the rim. Then they can stand it on an old coffee jar lid to dry. Wash their brush and let this dry too.
3 When they've decided how they are going to decorate the pot, they can paint it on with the thin brush. They can paint spots or stripes, flowers, a face, or even some ladybirds! Tell them to let their imagination go wild or try some of our design suggestions below.
4 If they are using more than one colour for their decoration, they need to let the paint dry between each colour.
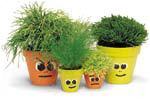
1 Ask the children to apply two coats of light-coloured paint on to a prepared terracotta pot, allowing time between each coat for drying.
2 Next they should draw a face design on paper and cut it out, ensuring it's the right size for the pot.
3 They can lay the paper design on to a cut potato and use it as a guide for cutting the shapes in the potato. You may need to help the children with this. They should peel the paper off when finished.
4 Get the children to dip the potato shapes in paint, then print on a piece of scrap paper as a test before printing their face on the pot.
 |
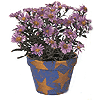
1 The children need to apply one coat of gold paint, then leave it to dry.
2 Ask them to draw star shapes on plain paper and cut them out. Ensure they have enough to cover the whole pot.
3 They should position paper stars on the pot using reusable adhesive and apply blue paint to all the gaps in between the paper stars. And then leave to dry.
4 Next they can gently remove paper cut-outs to reveal gold stars shining in a blue sky.
5 If they dab a little gold paint on top of the blue using a dry, stiff brush, it will create a stippled effect.
 |
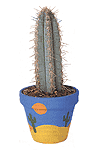
1 Get the children to draw a desert design on a prepared terracotta pot with a pencil.
2 Following their pencil lines, they should paint in the design with coloured paint and leave to dry. They can touch up any mistakes using a small brush.
 |
BBC © 2014The BBC is not responsible for the content of external sites. Read more.
This page is best viewed in an up-to-date web browser with style sheets (CSS) enabled. While you will be able to view the content of this page in your current browser, you will not be able to get the full visual experience. Please consider upgrading your browser software or enabling style sheets (CSS) if you are able to do so.
