Constructions using a ruler and a protractor
It might be useful to look at M1 Properties of Angles and M1 Properties of 2D shapes.
Constructions are accurate drawings of shapes using a ruler and protractor.
From a sketch or a description, you may be asked to construct a triangle
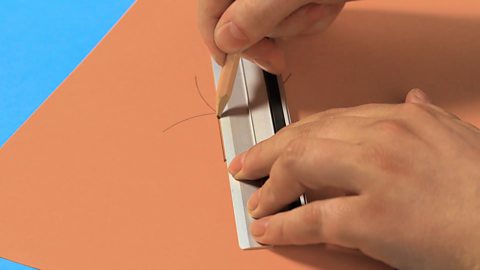
How to construct triangles given 1 side and 2 angles
Step by step instructions

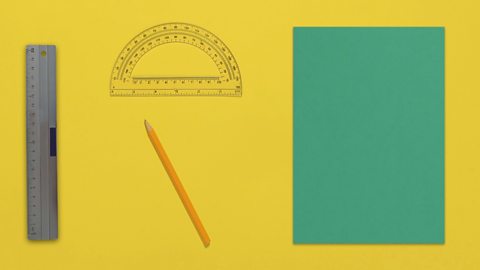
Image caption, What you need: ruler, protractor, pencil and paper.
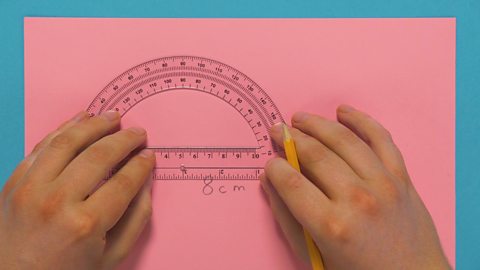
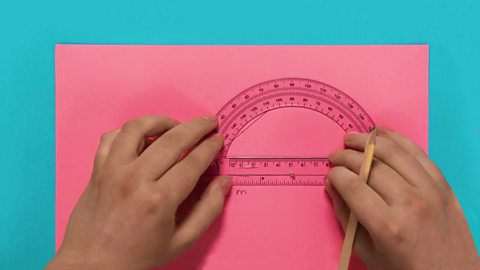
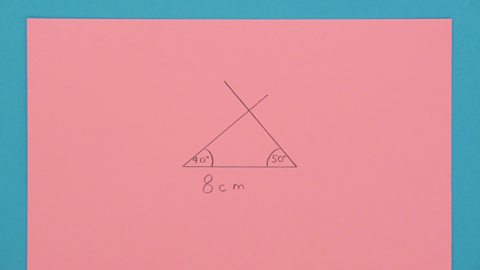
Use these to construct a triangle when you know the length of 1 side and the 2 angles at each end of it.
In this case use the length 8 cm, and the two angles 40° and 50°.
Image caption, Step 1:
Draw an 8 cm line using a pencil and ruler.
Place the centre of the protractor on the end of the line and mark 40° with a dot.
Image caption, Step 2:
Use a ruler to draw a line from the end of the line through the dot and label the angle 40°.
TIP: you won't know the exact length of this new side yet so draw it a bit longer than you think you'll need. You can always extend it later.
Image caption, Step 3:
Place the protractor on the other end of the first line and mark a 50° angle up from the line with a dot.
TIP: often protractors have an inner and outer scale. Make sure you read the one that has zero on the first line.
Image caption, Step 4:
Draw a line from the end of the line through the dot so it crosses the other side. Extend the lines if you need to.
Mark this angle 50°.
You've constructed a triangle, given the length of 1 side and 2 angles.
TIP: if one of of the 2 angles is NOT at the end of the side you're given, it's easy to work out the third angle using the fact that there are 180° in a triangle.
1 of 5
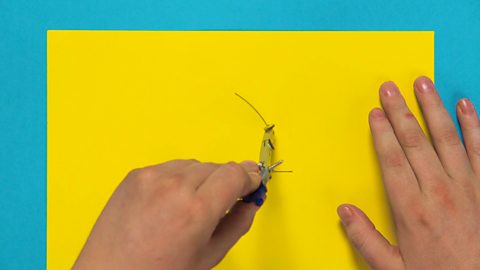
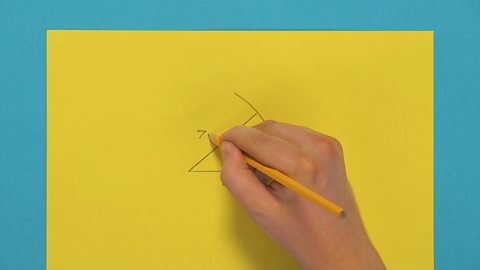
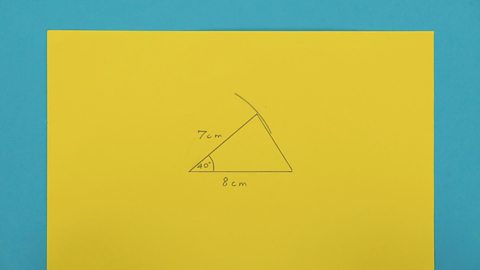
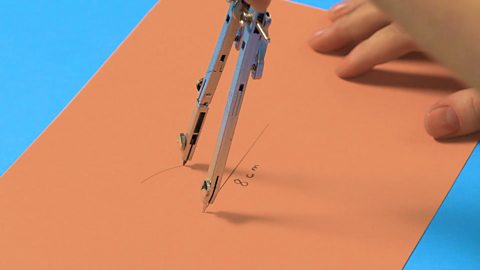
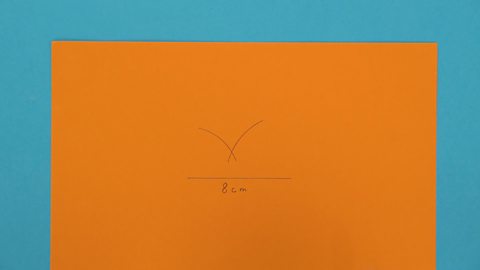
How to construct triangles given 2 sides and 1 angle
Step by step instructions

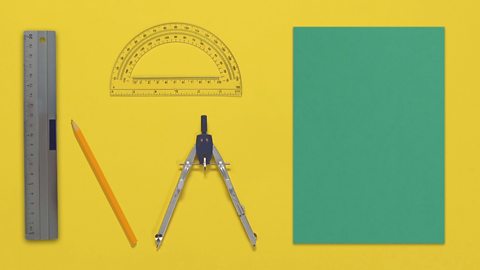
Image caption, What you need: ruler, protractor, compass, pencil and paper.
Use these to construct a triangle when you know the length of 2 sides and 1 angle
In this case use 2 side lengths of 7 cm and 8 cm and the angle 40°.
Image caption, Step 1:
Draw a straight 8 cm line using a pencil and ruler.
Set the compass width to 7 cm. Place the compass at one end of the line and draw an arc.
Image caption, Step 2:
Centre the protractor on the same end of the line and make a dot at 40°.
From the same end, use a ruler to draw a line through the dot, crossing the arc.
Label the length 7 cm and the angle 40°.
Image caption, Step 3:
Use the ruler to join the other end of the horizontal line to the end of the side you have just drawn.
You've constructed a triangle after being told 1 angle and the length of 2 sides.
1 of 4
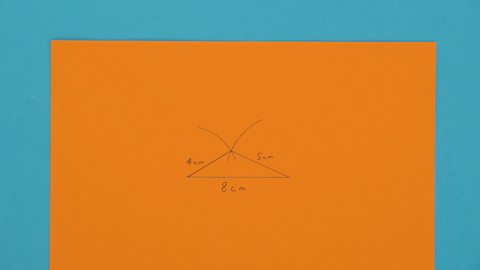
How to construct triangles given 3 sides
Step by step instructions

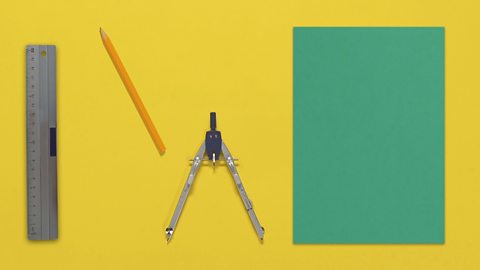
Image caption, What you need: Ruler, pencil, compass, paper
Use these to construct a triangle when you know the length of all 3 sides.
In this case use the lengths 8 cm, 4 cm and 5 cm.
Image caption, Step 1:
Draw a straight 8 cm line using a pencil and ruler.
Set the compass width to 4 cm. Place the compass at one end of the horizontal line and draw an arc.
Image caption, Step 2:
Set the compass width to 5 cm.
Place the compass at the other end of the line and draw an arc that crosses the first arc.
Image caption, Step 3:
Use the ruler to draw a line from the left end of the horizontal line to the point where the two arcs meet. Label the line 4 cm.

Image caption, Step 4:
Use a ruler to join the other end of the line to the point where the two arcs meet. Label the line 5 cm.
You've constructed a triangle after being told the length of all 3 sides.
1 of 5
More on M5: Geometry and measures
Find out more by working through a topic