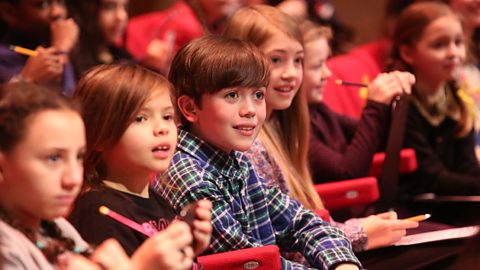
Watch again: Live Lesson video clips
This set of shorter video clips is taken from the Live Lesson programme and can be used to teach individual topics.
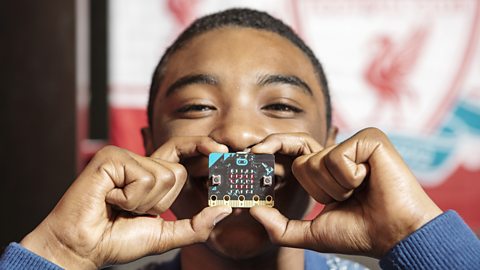
Introducing the BBC micro:bit
Narrator:
This is your BBC micro:bit, even though it looks like the computers you're used to that's exactly what it is, a fully programmable computer that fits neatly into the palm of your hand.
Narrator:
On the front of your micro:bit you'll find 25 little LEDS, these can be programmed to display messages, images or even animations.
Narrator:
Here you'll find two buttons imaginatively named A and B. You can program these to do all sorts of things, control a robot, send a secret message or even choose or pause songs on your playlist.
Narrator:
And there's more. With three input/output pins you can connect your micro:bit to other equipment to create some amazing stuff like this incredible slug and snail sensor that I built for my garden, and trust me I need it.
Narrator:
On the flip side you've got an accelerometer so you can do things like turn your micro:bit into a pedometer and a compass so it can tell you the direction you're heading.
Narrator:
Of course it'll need a battery to keep it going and a program that tells it what to do, but what that program is, it's completely up to you. You could create a musical instrument, an alarm clock or even some day a drone. The sky's the limit.
Introducing the BBC micro:bit
Watch this short animation to find out more about the BBC micro:bit and its features.
Games
Ana Matronic:
I need to introduce you to our friend. The gigabit. It's identical to the microbit I have in my hand only, well it won't fit in my hand because it's massive. We have made a huge version so we can play with it and you all can see what's going on. So here's Dan and Ella to explain a little more.
Dan Walker:
Okay bit pressure. Don't drop it. Oh [LAUGHS] Thank you very much. Thanks Ana. Now Ella, my gaming days might be slightly behind me but can I even get to use this? How does it work?
Ella Williamson:
Well I have coded a simple fortune teller game on this so I'm gonna ask the microbit. Give it a shake. Dan, it says, yes. Yes, yes, yes. You can do this.
Dan Walker:
Right. But does it really know or is it a bit random?
Ella Williamson:
Well it is a bit random so, basically, you can basically make this just using a simple random piece of coding so I get the microbit to think of a number between one and four and, for each random number, there's a different answer.
Dan Walker:
Okay. So can you ask it another question? Let's put it to the test.
Ella Williamson:
Okay. So I'm gonna ask the question, "Is there anyone here that can help us create some more games for the microbit?"
Dan Walker:
You do not need the microbit for that. I know the answer to that one. Let me introduce you to a gentleman over here. Simon Smith is here from Thumbfood who knows all about making games. Hi Simon. Thank you. Welcome to our lovely space here today.
Simon Smith:
Hi there.
Dan Walker:
How did you first get into the world of gaming?
Simon Smith:
Well I've never wanted to do anything else, ever since I was at school. Ever since I was eight years old. So I went to University, did film studies, a creative course and then I applied for jobs at games companies. Got a job as a Level Designer and moved up from there.
Dan Walker:
So that was your way in and how many people are involved in that? Is it something that you can do on your own?
Simon Smith:
You can do it on your own but you have to remember that there's lots of different jobs so, if you do it on your own, you've got to be a Programmer, an Artist, a Musician, Business person. It's a lot to do so we tend to have multiple people on the teams and it can do up to two or three hundred people.
Dan Walker:
Right and we're talking a lot today about scaling up and starting small and building towards things and talking there with Ella about random function and that's still important in the big budget games that you're involved in now isn't it?
Simon Smith:
Yeah, absolutely. You don't want a game that's gonna be predictable and you don't want a game that's gonna be just against the computer 'cause the computer's gonna win 'cause they're super intelligent. So you need to put random functions in using a code so that the game's more interesting, more like a human, so you're playing against a real person. And you can use the microbit to practice doing that and get random code and come up with more ideas.
Dan Walker:
And there's lots of people here who may well fancy a career like yours. The good news is everybody, you're actually sort of recruiting. You're looking for people with the sorts of skills that might be on offer here. So what particularly are you looking for?
Simon Smith:
Well we need people that can be, you know, sort of given tasks to do and can do them on their own but we also need people that can work together with other people because, as I say, we have these big teams of up to three hundred people, even more sometimes, making games. So you've got to be able to work in a team. A Programmer's got to be able to work with an Artist who's got to be able to work with a Musician. Everyone working together to make the game.
Dan Walker:
Importantly, the microbit is a really good starting point isn't it?
Simon Smith:
It's great yeah. You can take the microbit. You can learn how to code and then you can move onto something else and get more complicated and you can make a game on the microbit.
Dan Walker:
Okay. We're gonna do that right now. Okay, pay attention everybody. This one Ella, involves potatoes. Is that right?
Ella Williamson:
That's right. Have you played Hot Potato at a party?
Dan Walker:
One of my favourite party games.
Ella Williamson:
[LAUGHS] It's so good isn't it? It's a race against time. You pass the potato around and, if you're left holding the hot potato when the buzzer goes off, then you're out. And we have got a team here from Neston High School. They're playing it here. Perhaps you could pass me the potato. Shall I try and catch it? Lovely. So we have made our own homemade potato casing and we've put the microbit inside it. There you go.
Dan Walker:
Obviously, we should probably mention that it's not a good idea to put a microbit inside a real potato. What you need are the component parts. I can show you those here. So the three bits are the microbit itself, the battery pack and the buzzer. So Ella, hopefully, you can tell us exactly how all this sort of comes together. How does it work?
Ella Williamson:
Sure thing. No problem. So we're gonna be using the blocks editor over here and this is on the Microbit website but you can use any of the other languages on there, whichever you so desire. So, we're gonna be coding the Hot Potato Game and we're gonna start with the forever loop. Now this is often used when it comes to making computer programmes and, whatever you put in it, means it's gonna happen over and over. So, we've called our variable, "Time to Buzz" so I'm just gonna put my finger on there, drag it up and put that within the forever loop. So what we want it to do, Dan, is to pick a number between nought and a thousand so I'm now gonna drag that up and put that next to our variable.
Dan Walker:
Just chuck that in like that. That simple.
Ella Williamson:
Just chuck it in like that. So it's blocks. It's a very visual way of coding. So it will be familiar to whoever uses the scratch before so it will look nice and familiar for you. So, now we're gonna add a loop. We're gonna add while do and we're gonna pop that underneath our variable bit there. So, what we want it to do is tell us that, whilst the Time to Buzz is less than a thousand, and that's what this arrow pointing to the left is, less than. Drag that up. So, whilst the Time to Buzz is less than a thousand, we want it to add the number one. So, you can see the number one here. So I'll drag that up. Pop that in the do. So, whilst the Time to Buzz is less than a thousand, say nine hundred, less than a thousand, we want it to keep adding one until it gets to a thousand and that's when the buzzer's gonna go off. So I need to make sure the buzzer goes off. To do that, I'm gonna go into music. Drag this piece of code underneath the while do loop and then, the great thing is, you can also customise this. You could choose the note. You can choose how long you want it to play for and, for a little bit of extra dramatic effect, I'm gonna add a pause underneath. There we go. And that's how you code Hot Potato.
Dan Walker:
That's great 'cause there's like basic principles but then you can be as creative as you like within that. Excellent. Thank you very much for that. We have all the resources that you need to create this game yourself on our website, as we continue to play a bit of Hot Potato here, including how to make a steaming potato animation just like this one.
Ella Williamson:
That's pretty cool isn't it. I hope you do that at home. But your imagination really is the limit. You can create loads of games just by using variables like I've done here. Now Ana's with another group of kids. What game are you playing Ana?
Ana Matronic:
Alright. Well I am here with Harvey and Isabella and we have turned the microbit into dice. So you guys wanna go ahead and play? Alright. Now these aren't just any old dice. Oh no. you are not restricted to six sides, nor to numbers between one and six. The only restriction is your imagination. The result can be anything you want it to be. Not just numbers. You can use words as well. So Harvey and Isabella are having a race up these stairs. Their options include backwards steps as well. And it works just like dice. You have to shake it to see what you get. So how are you getting on guys? Harvey?
Harvey:
We're doing alright.
Ana Matronic:
Yeah. So we got Isabella in the lead. Feeling good about it?
Isabella:
Yeah.
Ana Matronic:
Alright. Good. Let's see. Harvey's taking the lead. [LAUGHS] You can really go anywhere with your microbit so we're gonna have to leave it there and we'll see who is the winner but these are just some of the great games that we have come up with. You can make up your own. The only limit is your imagination.
Dan Walker:
That's an important note as well isn't it Simon? The imagination, even a little bit, can take you an awful long way when it comes to this sort of creativity.
Simon Smith:
Yeah. You can make a game about anything. You just need to look at the world around you for inspiration. I've seen people make games about cooking and [LAUGHS] football obviously. But you can make a game about something abstract. Space. Robots. And you can use the microbit to do that.
Games
Find out all about creating your own fun playground games using the BBC micro:bit.
Please note that this resource was developed in 2016 and some of the links to the previous micro:bit code editors on the original printed resources may no longer work. We have removed the links to the hex files, but a number of the code projects on the activity sheets can be replicated using the new MakeCode editor available on micro:bit.org, so these sheets are still available for your information.
Your students may need these downloadable activity sheets and hex files:
Hack your bedroom
Presenter:
Right, I'm about to go and check-in with Amy Mather, she's having such a good time here with her micro:bit that she's kind of set up home. Amy, this is looking like your bedroom, what is going on here?
Amy:
Well I decided to, how you can hack your own bedroom using the micro:bit.
Presenter:
Amazing. So let's start with this black and white loveliness on the wall. So what is it?
Amy:
Okay, so what I've done is I painted a keyboard onto a canvas using some conductive ink.
Presenter:
Okay well it looks fab, but where does the micro:bit come in?
Amy:
Okay well you see if I touch here and then play any of the keys it'll play next.
Presenter:
So it's like an actual keyboard?
Amy:
Yes, so if I hold your hand.
Presenter:
Yeah.
Amy:
Then actually we can both play it together.
Presenter:
Oh wow, oh I'm feeling so musical.
Amy:
[LAUGHS]
Presenter:
And can you do that just with a micro:bit?
Amy:
Well if you only want to use [three units] then you can just use the pins, the three main pins on the micro:bit, but if you want to add more then you need to attach a breakout board.
Presenter:
Is that difficult?
Amy:
Not really. So you'll need a breakout board and then some wires, but I've done a tutorial on the BBC website if you want to find out more.
Presenter:
Okay, so you can check that out on the website and then we've got the micro:bit down there. Oh that's brilliant. Basically redecorating your bedroom right now aren't we, and this is just some of the cool things you can do with the micro:bit.
Amy:
Exactly.
Presenter:
And then what's this blue one over here?
Amy:
Okay, so this is just a constellation I've made. Could you guess which one it is?
Presenter:
Is it Taurus?
Amy:
Yes it is, and so it's really easy to create whichever constellation you like just by using some blue and white paint.
Presenter:
Okay, and then so it looks like we've got some LEDs in there. Again it looks fab, but how does the micro:bit kind of make it come alive?
Amy:
Well if you look on the back and we turn the micro:bit on you can see that the micro:bit is attached to each of the groups of LEDs, and actually it's controlling them.
Presenter:
That's brilliant. So in terms that you can basically customise the light in your whole bedroom, that's really cool. And then speaking of lights we've got some lamps over here haven't we?
Amy:
Yeah.
Presenter:
So these look like you've been customising them, so what have you done to create these?
Amy:
Okay, so what I've done is I've attached an LED to our micro:bit. This one's a neopixel so that means that you can change the colour of it, and I've also attached an LDR or a light dependent resistor.
Presenter:
Okay, and what does the LDR do?
Amy:
So the LDR changes its resistance depending on how light it is in the room, so basically it tells the micro:bit how bright it is in the room, and then the micro:bit can decide when to turn the light on.
Presenter:
So if we get a darkened room it might come on?
Amy:
Yeah.
Presenter:
Shall we give it a whirl?
Amy:
Yeah.
Presenter:
Right let's dim the lights and then see it come into action.
Amy:
There we go.
Presenter:
So you've got colours in the LDR, that's really magnificent.
Amy:
And you can just use the light using either a laser cut box or you can create your own card template like this.
Presenter:
Okay that's brilliant.
Amy:
And everything's all hidden inside.
Presenter:
And you can kind of change it with your mood, can't you?
Amy:
Yeah you can, exactly.
Presenter:
Lovely. So we're in the bedside table here, so just pretend you can't see me I'm just gonna go and just see if I can read your diary back here.
Amy:
Oh look at that, I've got an alert telling me that somebody has been snooping in my drawers.
Presenter:
Oh so I can't get away with snooping and borrowing your jewellery?
Amy:
No, and also it means that you can keep an eye on your little brother when you're not home.
Presenter:
Oh he's a pesky one, that little one. That's amazing, thank you very much. Now what have you always wanted to do with your bedroom? Get thinking, get creative and perhaps the micro:bit can help you out. Also check out our website for some of Amy's inspiring videos.
Hack your bedroom
Amy Mather steps us through some ways you can hack your bedroom with the BBC micro:bit.
Robots
Narrator:
This is Valkyrie, a humanoid robot made by NASA. Its metal bulk means that, even at 170 cm tall, it weighs four times as much as the average 11 year old, weighing in at 120 kg. It's the result of a collaboration between NASA and the University of Edinburgh on a very ambitious space project. NASA will send a team of Valkyrie robots to Mars to prepare things on the hostile planet's surface ready for the arrival of their human colleagues. The reason it looks so human is so it can use exactly the same equipment as the astronauts it will be working with. Valkyrie has 44 movable joints, giving it very similar levels of dexterity to a human being. The team working on Valkyrie have to develop new techniques and algorithms to help the robot's walking, manipulation and balance control, all things that we take for granted as human beings. The Valkyrie is at the forefront of a new frontier for robotics working towards a future where robots and humans work in collaboration, side by side, to achieve great advancements in space exploration.
Dan Walker:
That music is just magnificent isn't it? We're joined now by Professor Sethu Vijayakumar: and some members of his amazing team from Edinburgh University. Valkyrie. I mean what a bit of kit that is.
Sethu Vijayakumar:
Absolutely. I just got an email yesterday from Kim Hambuchen, the Director of the Space Voyage Challenge saying, "Your girl's flown."
Dan Walker:
Okay. So I need to process this. You got an email from NASA. And when they say, flown, how far through the process? There's still lots of work to do isn't there?
Sethu Vijayakumar:
Yeah. So actually it's not flown to Mars. So actually it's on its way to Edinburgh and, over the next four to five years, we are going to work, and the team is going to work, on algorithms for making the robot walk, manipulate, do the things that you and me do but do it much more efficiently and, as a roboticist, I'm really excited about it.
Dan Walker:
You've got a robot nut here as well. [LAUGHS]
Ana Matronic:
I'm really excited about that. So, in the next four or five years, I'm gonna come to Edinburgh and, hopefully, touch your Valkyrie. Now I love all robots. Valkyrie is state of the art but some of her processes can be made quite simply with stuff at home right?
Sethu Vijayakumar:
Absolutely. So robotics, you can make it as complicated as a Valkyrie or as simple as something here so you can really suit the projects that you do in robotics to your budget and your talent.
Ana Matronic:
And now I see, on the base of these things, those look like toothbrushes to me. This looks like something you really can make at home.
Sethu Vijayakumar:
That's correct. So it's made out of two toothbrushes, a battery pack and your microbit. So if you make this, it's basically an off centred motor. If it's wired right it can basically do a little jig of its own.
Ana Matronic:
Fantastic. Alright, now don't go getting all your family's toothbrushes and cutting them off. We have instructions on our website. Work sheets show you how to create these little micro-bots and they're all on our Live Lessons website.
Dan Walker:
What are these funky little guys? What are they doing?
Sethu Vijayakumar:
So actually Dan, these are commercial versions of what we just built. They're called the Hexbug and the principles are again exactly the same. You have a little motor that vibrates and here its completely open loop means that it reacts with the environment and does what you think is a really fancy move but it is actually completely open loop.
Dan Walker:
Okay.
Ana Matronic:
So a very simple principle. But we've got something a little bit more advanced here.
Dan Walker:
Yeah the big boy.
Ana Matronic:
A humanoid robot.
Sethu Vijayakumar:
That's correct. So this is the next step up from a bug.
Ana Matronic:
Okay.
Sethu Vijayakumar:
So this, as you can see, is a mini humanoid called Condo and it's got 19 joints of, what we call, the degrees of freedom and, actually, you can basically program it with very simple principles, exactly as the robot there. You can take each of the joints and the difficult bit is to sequence all of them to actually do a little complicated job.
Dan Walker:
Yeah, let's see what he's got.
Ana Matronic:
Oh wow. What a gentleman.
Sethu Vijayakumar:
So I think, as you can see here, you can get it to do rather complicated things but, what's slightly complicated and more difficult to explain is that, while he's doing this, if I be a bit nasty and give it a push, it doesn't recover from it so it can only repeat the same things again and again and really do it very well but not react to external forces.
Ana Matronic:
Okay.
Dan Walker:
I absolutely love that. You've got to be careful. She will take that home with you right? [LAUGHS]
Ana Matronic:
Yeah. You might have to search my bag.
Dan Walker:
We're gonna let you go 'cause you've got something funky to put on for us in a minute.
Ana Matronic:
I do.
Dan Walker:
We'll be back with Ana in a moment. And Sethu, if we come down here we've got a sort of, I suppose, the next level up. That's right isn't it? And, Sandy one of your PHD students, who's not a robot, he's a human, I have checked, is here as well. And talk to us a bit more about this. This is like the next stage in, I suppose, evolution of robots you could say.
Sethu Vijayakumar:
That's correct. So, so far so for all the robots that we've seen earlier, they were pretty much repeating what you've got to do without any human input. So the next couple of robots you're gonna see are things where humans, so for example you and me could change the behaviour of the robot by an external input, and I think the first thing we're gonna do is to get Sandy to explain a little bit about Archie, the robot and he's a developer of that.
Dan Walker:
'Cause you've got a microbit in your hand there haven't you?
Sandy Enoch:
I do yeah. So I'm using the microbit here to actually control the robot, so as a control for it. So we're sensing the tilt of the microbit and using that to steer the robot around. So this is kind of like the sensor you could use on the robot to sense how it was balancing and we can add that information in and get the robot to actually listen to its environment as well as do things like play games like football.
Dan Walker:
Okay. You're slightly blowing my mind. What I find annoying about you and impressive at the same time, is that you did this in your spare time. This wasn't in your PHD. [LAUGHS]
Sandy Enoch:
Yes, this was a side project I did but it was more fun than my PHD so, you know.
Dan Walker:
You've got some good students, yeah.
Sethu Vijayakumar:
And actually this bit uses the accelerometer from the microbit but we can also use the magnetic sensor and I could build another piece of equipment which is basically using this like a magic wand to pull and push this kit. So it's really the on board sensors can be used in very, very creative ways to control and create input to the robot.
Dan Walker:
Okay. Sandy you keep playing with Archie. Let's move Sethu along the chain. Now this is a game which people recognise. We've got Eleanor here who's playing a robot at this game which many people have played at home. This looks like the next level up. What's happening here?
Sethu Vijayakumar:
So this is a Connect 4 robot obviously but, basically, this really captures the essence of all of robotics. So there is sensing which is a camera looking at the state of the board and making basically the sense of the state of the [UNSURE OF WORD] of the board. You've got a robot arm which is moving and picking up pieces and playing the game and there's an AI which is connecting the sensing to the actuation to figure out what is the next best move to make.
Dan Walker:
Okay. Let's find out from Eleanor whether she's managed to beat the robot yet. Any chance?
Eleanor:
No.
Dan Walker:
Has it wiped the floor with you so far?
Eleanor:
Yeah.
Dan Walker:
Okay. Is that because it's unbeatable Sethu? Can Eleanor beat it? Can somebody beat it?
Sethu Vijayakumar:
So Connect 4 is what is called a solved, so completely, strongly solved game which means that, in theory, if you start the game as if you are the first move, then you can win but, although Eleanor has started, if you make a single mistake, the robot will get you.
Dan Walker:
Okay, Eleanor, I'm sorry. You've basically got no change whatsoever. Although there is a flaw in your plan. You haven't named this robot yet?
Sethu Vijayakumar:
That's correct. How about we suggest something?
Dan Walker:
This is a big moment. Roger the Robot. Is that right?
Sethu Vijayakumar:
That's a very good name.
Dan Walker:
Okay excellent. I thought we might get a round of applause for Roger the Robot. Is that-- no? Thank you. Thank you. Thank you everyone. Again, one of the essential things about this is these are principles here which are the same, which you've used in the microbit, which go right the way up to Valkyrie don't they?
Sethu Vijayakumar:
Absolutely. So this really embodies the fact that, when you find something that's unexpected, the robot has to react and change its behaviour and, for example, if you send a robot to Mars, you cannot possibly know all eventualities and you cannot program for all these things. And this is an example of how a robot reacts to how a human plays and changes its behaviour based on that.
Dan Walker:
The good thing is though, Eleanor was smart enough to notice that Roger the Robot had run out of counters and you put the counters in so, without the human element, it wouldn't have worked. We still need humans. So Sethu now, again, this is where we're gonna bring Ana back in because something funky is happening over here. You need to explain and talk us through exactly what this is.
Sethu Vijayakumar:
So we've actually managed to finally build a robot hand that matches Ana's passion, her fame and her tattoo.
Ana Matronic:
Yes.
Sethu Vijayakumar:
So we've got this prosthetic hand which is actually things that, for example if you have lost your limb in an accident or if you're born with a congenital defect, then you can actually use this to restore the upper limb, sorry the motor capabilities, of just using this prosthetic hand. So what I'm gonna try and do is to try and control Ana's prosthetic hand…
Dan Walker:
With your arm, yeah?
Sethu Vijayakumar:
…with my arm. So there are these END sensors which are sensing the muscle activity on my hand and really the hand is responding to that. So we're going to try and attempt to lift this ball up and hand it over to Dan.
Dan Walker:
Thank you very much.
Ana Matronic:
Oh, that's so cool.
Sethu Vijayakumar:
And we're gonna try and attempt to pick up this bottle and, again, hand it to Dan.
Dan Walker:
Thank you robot arm.
Sethu Vijayakumar:
So this is an example of what we call shared autonomy where the intentions of the human motion is transferred to the smarts of the hand and a lot of the elements, in terms of the control, is happening in the hands.
Ana Matronic:
And now you have a student with us today. This is Iris who is working on a more advanced version of this technology so tell me about this.
Sethu Vijayakumar:
That's correct. So Iris is a [UNSURE OF WORD] student who is working on the next generation. So, in the previous example you saw, that I had to actually move and send the open and close signals. So, here, the system that Iris is working on is pretty much actually detecting the intention of the person wearing the prosthetic to figure out whether he's going to lift a bottle or a CD case or a credit card and change the grip and pre-shape the grip so that the person who's using it can use it much more effectively and much more easily.
Ana Matronic:
Wow. So these sensors that I see on her arm are obviously much more sensitive than the one that you have and they're sensing the micro transmissions of her muscles.
Sethu Vijayakumar:
Absolutely.
Ana Matronic:
That's amazing. It's incredible. It look like you're moving it with your mind. [LAUGHS] it's fabulous. Wow. It's amazing.
Narrator:
Did you know the first working robot was used to make cars in a Ford factory in 1961? Today there are over a million robots in use across the world, with over half being used in Japan. The smallest robot is called a nanobot. It measures 10 nanometres in size which is less than one thousandth of a millimetre.
Robots
Professor Sethu Vijayakumar tells us all about robots and the principles behind them.
Your students may need this activity sheet and hex file:
Make a micro:monster
Presenter:
I've got one word for you, Ana: , Tamagotchi. Remember those little bad boys?
Ana:
Yes, the digital pets that you had to feed to keep alive.
Presenter:
Exactly. Right and we're gonna learn a lot more how to create our very own digital pets or micro-monsters as we're calling them. You can feed and exercise them to keep them healthy and happy. You can change how your micro-monster looks and acts as well, or even how much attention you pay to them. If you haven't yet downloaded the code for your micro-monster, again go to the website bbc.co.uk/livelessons. I think we need a bit of help there, don't we?
Ana:
I think so too.
Presenter:
I need you to go wild here we've got a very special guest she's 16 years old, but she was named Digital Girl of the Year in 2013 by the European Commission, it's Amy Mather. [APPLAUSE]
Presenter:
Come on.
Ana:
Welcome Amy, hey.
Ana:
So tell us Amy, how long have you been interested in coding and computer science?
Amy:
So I've been interested in coding for about five years now, I was introduced to it at the Manchester Science Festival when I was about 11 years old.
Ana:
Amazing, and what do you like about coding?
Amy:
I just love the puzzles and the challenges that it gives you, and I love the feeling that you get once you overcome all the bugs in your program.
Amy:
Fantastic.
Presenter:
And you've brought a little micro-monster with you.
Amy:
I did.
Presenter:
So if you get it out for us and just explain what sort of things you can do with it?
Amy:
Okay, so what you can do is you've got to make sure that you keep your micro-monster alive for as long as possible, so what you do is you keep it happy by feeding it by pressing button A.
Presenter:
Right, and you're gonna show us how to keep it happy because we have a beautiful laptop here ready, and you can take us through the whole process can't you.
Amy:
Yeah. So what we need to do is we need to give it some code, so if you look here it's a little bit different to the blocks that we've been used to, so what we're actually using is we're using the touch develop.
Presenter:
And how different is that to what we've been seeing already then?
Amy:
It's just kind of a different method of coding, but most of the principles are still the same. So we've still got variables and up here we've said that the micro-monster is alive at the beginning by setting alive to true. We've said that the micro-monster is happy at the beginning by setting the variable sad to false. Initially our micro-monster isn't very hungry and the initial time that it's been alive for is set to zero, and because it's happy we've created a smiley face.
Presenter:
Okay, so you can make that face look like whatever you want right from the start, yeah?
Amy:
Yeah. So if you do this then you can change which LEDs are going to be on.
Presenter:
So you can almost customize it to whatever you want it to look like?
Amy:
Exactly.
Presenter:
And people watching this at home they can create their own faces, they can do what they like with their micro-monsters?
Amy:
Yeah exactly that's the whole kind of point. But once you set up what happens when you first turn your micro:monster on and you want to kinda decide what happens as time progresses, so here we're going to add one to the time because we're showing that the time that our micro-monster's been alive for is increasing. After a certain amount of time has passed then we're going to make our micro-monster hungrier, and if it gets too hungry then it becomes sad.
Presenter:
Okay. Is sad bad? I mean how sort of emotional should we be getting about this?
Amy:
Well if it gets too sad then unfortunately it dies.
Presenter:
Okay can we have an ah for that, an ah for the little micro-monster?
Schoolchildren:
Ah.
Presenter:
That's very good, well done. Very good on cue there as well. But the good news is, don't panic everybody, you feed it and everything returns to normal, yeah.
Amy:
Exactly. So what we do in this bit of code is we're going to check to see whether or not the button has been pressed, and if the button has been pressed then we're going to reduce hunger and then we create our own little feeding animation.
Presenter:
And again that animation is customised so you can do what you want with that.
Amy:
So if you click on it like this and then you change all the frames, and if you look up here then it shows you a live preview of all the changes that you've made.
Presenter:
Okay, and what we're gonna try and do now is send what you're doing there, the animation, we can put it on the Gigabit so people can see that.
Amy:
Yeah. So once you've finished, what you do is you press compile and you wait for it to compile, and then what we're going to do is if I just minimize this, and bring up finder.
Presenter:
And again, people shouldn't be worried about how this looks or getting used to this because as soon as you're in there it feels quite comfortable and normal, yeah.
Amy:
So all we need to do is drag across our hacks file onto the micro:bit and wait for a while, and it should update on the gigabit.
Presenter:
Perfect, it's like we've planned it. Amy, thank you very much for that it's absolutely brilliant. In fact we'd love you to have a go at making your own animations for your micro-monster as well, just follow the instructions on your worksheet. Why don't you have a go and sent it through to us, live.lessons@bbc.co.uk, and we'll try as many of those as we can on the Gigabit at the end of the episode. You can also change other parts of it as well, is that right Amy?
Amy:
Yeah. So you can adapt your micro-monster to do whatever you want, you can change how long it takes for it to get hungry or you can add additional features such as exercising.
Make a micro:monster
Learn to create your own micro:monster with Amy Mather, Digital Girl of the Year 2013.
Please note that this resource was developed in 2016 and some of the links to the previous micro:bit code editors on the original printed resources may no longer work. We have removed the links to the hex files, but a number of the code projects on the activity sheets can be replicated using the new MakeCode editor available on micro:bit.org, so these sheets are still available for your information.
Watch the full Live Lesson
If you enjoyed these clips, catch up with this Live Lesson and learn more about coding and digital creativity
Secondary Live Lessons
Find out more about our Live Lessons designed for secondary school students
BBC Live Lessons homepage
Return to the BBC Live Lessons homepage for more curriculum-linked Live Lessons across primary and secondary