Pruning Plum trees Plum trees are different to apples and pears in so much as the main pruning is done while they are in active growth. This is because their chief diseases, namely bacterial canker and silver leaf, enter the branches through wounds and of course pruning cuts can provide some ideal entry points, so if the pruning is done while the trees are growing, they have a better chance to heal themselves and so prevent the disease spores from getting a hold. Exactly when is the best time, does create a little debate as some gardeners say that June is the best, as the trees are full of vigour and it is a little early for the disease spores to be floating around, while others advocate doing the job after picking the fruit, as earlier pruning can remove some of the crop. There is a general consensus that it should be completed before mid-August, as after that there are many more disease spore wafting around on the breeze and the formation of callous (the tree’s equivalent of scab tissue on a human wound) is much slower as Autumn approaches. So taking all this into consideration if you have a plum, or for that matter ornamental cherry tree that would benefit from a little pruning, you need to do the job pretty smartly. "How do we go about it then?" I hear you cry. Well, it’s not very complicated firstly remove any dead, diseased or damaged wood and then thin out any overcrowded branches and that is about it. 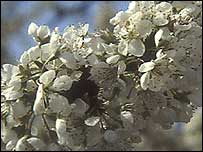 | | Plum blossom |
If you are growing a variety that tends to have a spreading habit, some of the leading branches may have to be pruned to an upward facing bud in order to counteract the tree’s tendency to produce drooping growth. Immediately after pruning, paint the cuts with a wound paint in order to provide extra protection from infection but, I stress, do it straightaway so that there is little chance of any spores getting in before the wound is treated. Sometimes if the treatment is applied after spores have landed on the wound then they grow away quite happily beneath the paint. Where you have a tree, particularly a younger one, which is growing away well but refusing to fruit, it would be a good idea to bend the branches down and tie them to a support, like a stake knocked into the ground, a process known as “festooning”. Make sure that the tie does not cut into the bark of the bent branch, I find that old tights are excellent for the job. Arching the branches in this way slows down the sap flow and so encourages them to make flower buds, rather than more vigorous vegetative growth. Check Cabbage leaves The cabbage white butterflies are around again doing their little ritual dances over your brassicas and then the females begin laying clusters of eggs on the undersides of the leaves. It is a good idea to check over the foliage of any cabbage family plants and crush any egg clusters that you find between your finger and thumb. 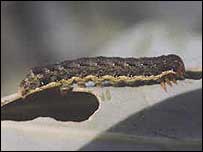 | | Cabbage caterpillar |
This is quite an efficient control measure, as long as you are not growing hundreds of plants, as if you wait until the eggs hatch, in order to use an insecticide like liquid derris, the caterpillars are bound to do a fair bit of damage before you spot them. Another good control measure, where this is practical, consists of covering the crop with fine mesh netting like environmesh, fibre fleece or old close meshed net curtains. When any of these are supported above the crop the butterflies are kept away from the foliage, so no eggs are laid on the plants. There is also a new biological control measure to replace the former product known as Dipel, which has fallen victim to the pesticide regulations. The active ingredient in this new product is a parasitic nematode called Steinernema carpocapsae, which should be sprayed onto the caterpillar colonies as soon as they are spotted. Remember to look UNDER the foliage as caterpillars are much easier to control while they are still small. Divide Flag Iris Flag irises grow rapidly and they benefit from being divided every five years or so because the centres produce fewer flowers as they age. This division is not at all difficult to do and the best time to carry it out is about five weeks after flowering ceases. You begin by cutting off the old flowering spike and then lift the clump, shaking off the soil so that you can see where the young, fleshy rhizomes join on to the thicker old ones. 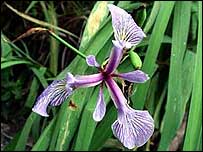 | | Blue Flag Iris |
The rhizomes are the stems, creeping along at ground level, from which the foliage arises. Cut off the young pieces where they join on to the older rhizome, trimming their leaves back by at least a half, so that they form a neat fan or dovetail shape. Discard the old rhizomes, fork over the planting site, adding a little rotted garden compost or fertiliser, and replant the young segments in groups of three or four, remembering that only the bottom half of the rhizome should be buried in the soil. |